
Type 1: A DIY Fine Particulate Mask
The following instructions are generated from Tomato Masks’ Type 1 v0.5 design document.
Disclaimer
This is a ‘Do It Yourself’ open source mask and we are not liable or responsible in regards to its performance or characteristics or how it is used. Build and use this at your own risks.
NOTE: This is not a respirator.
WARNING: Masks can be dangerous to people with respiratory or heart problems.
Table of Contents
Design Overview
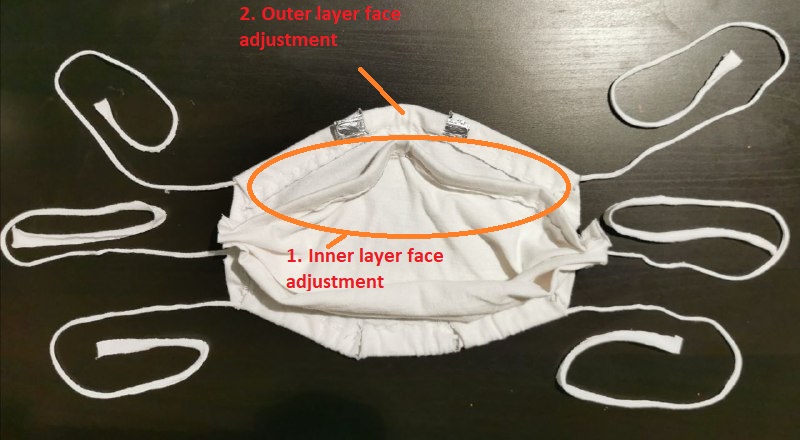
The current design consists of an inner layer and an outer layer, all made out of 100% cotton fabric. The mask has two levels of facial adjustment and three bands to allow for a snug fitting.
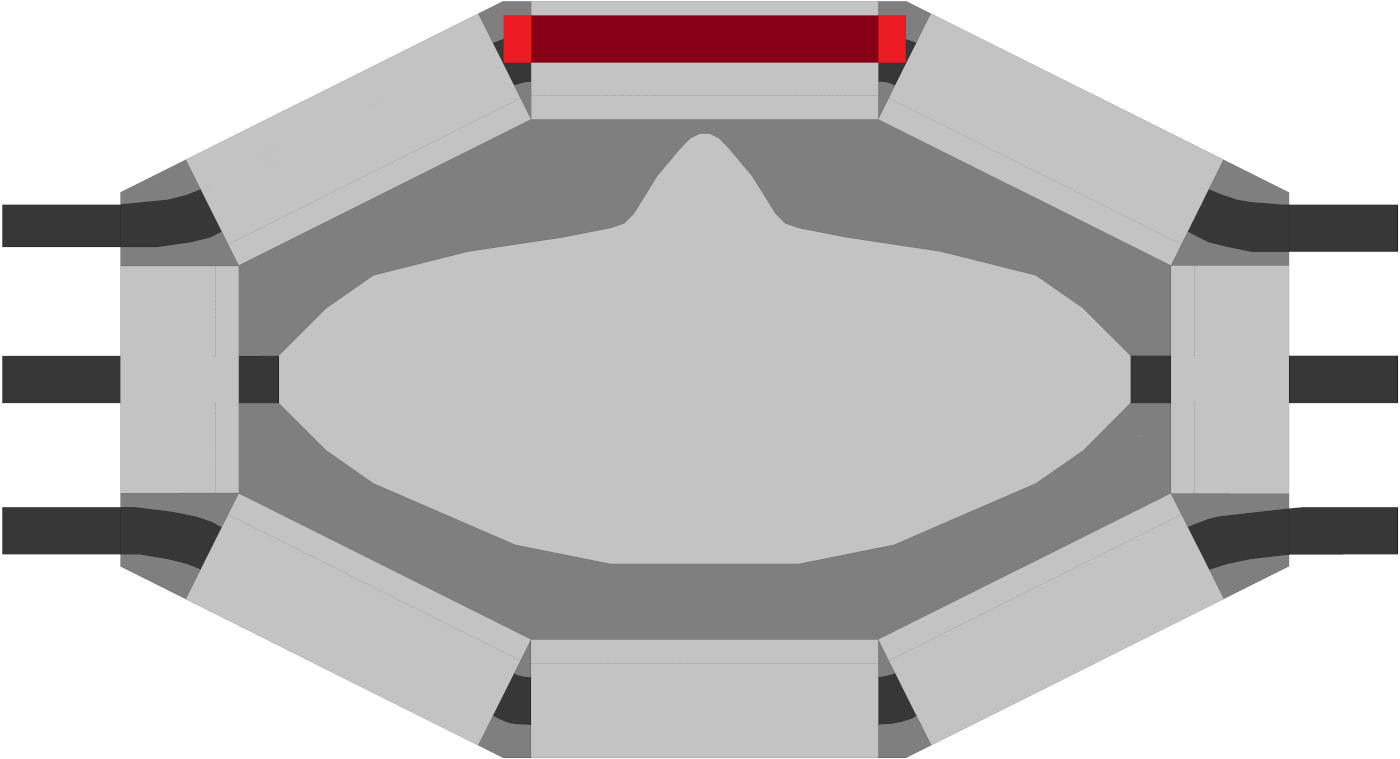
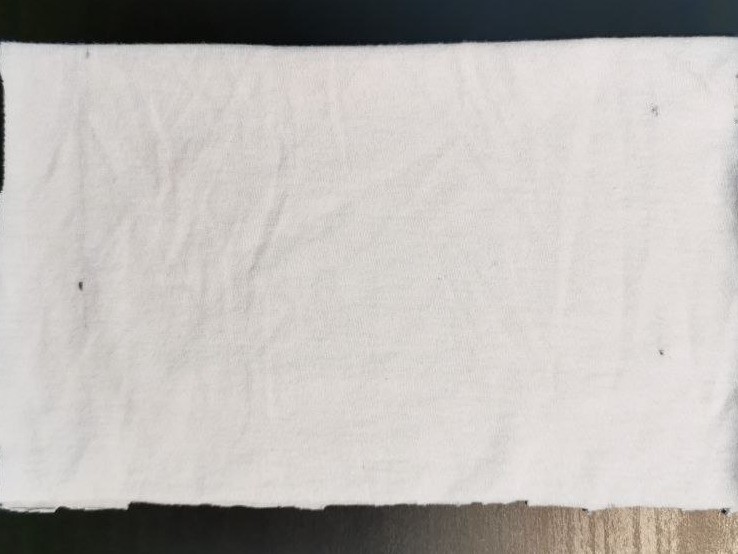
Fig 1: Concept - 100% Cotton Fine Particulate Mask
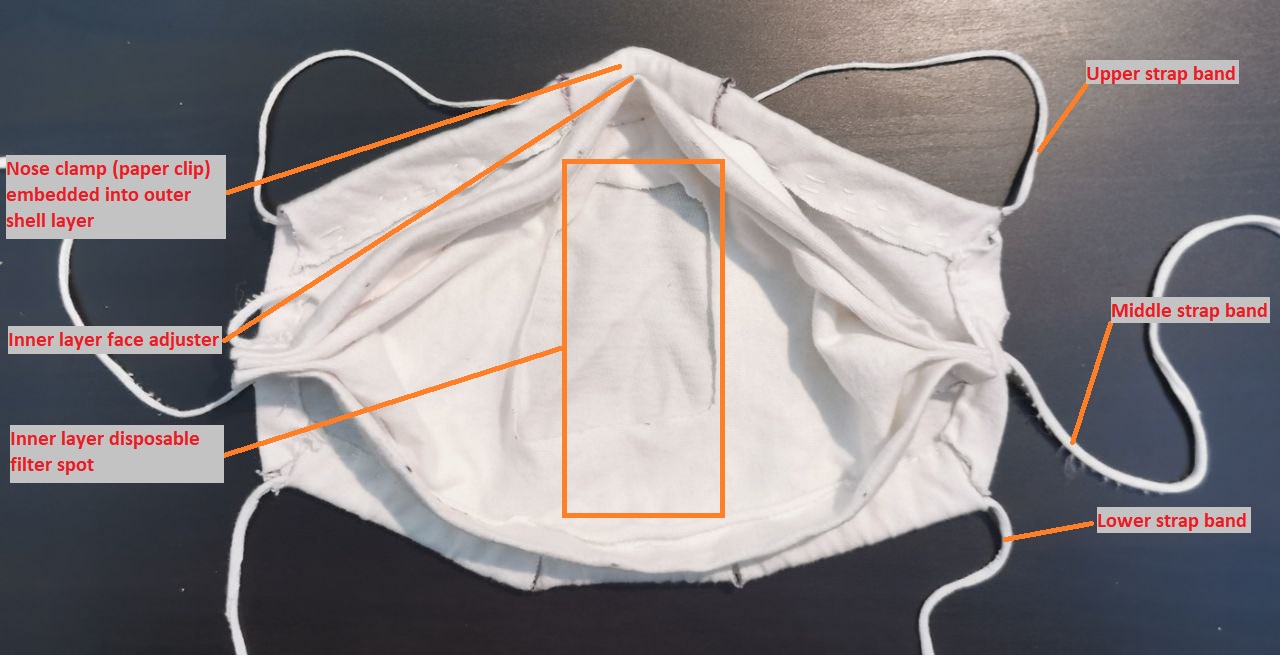
Fig 2: Actual - 100% Cotton Fine Particulate Mask
Inner Layer
An adjustable inner layer helps with the mask’s fitting to the shape of the face. The layer provides a tighter fit in conjunction with the outer layer. This layer has a pair of elastic bands made from 100% cotton. In addition, this layer acts as housing to hold an additional filter.
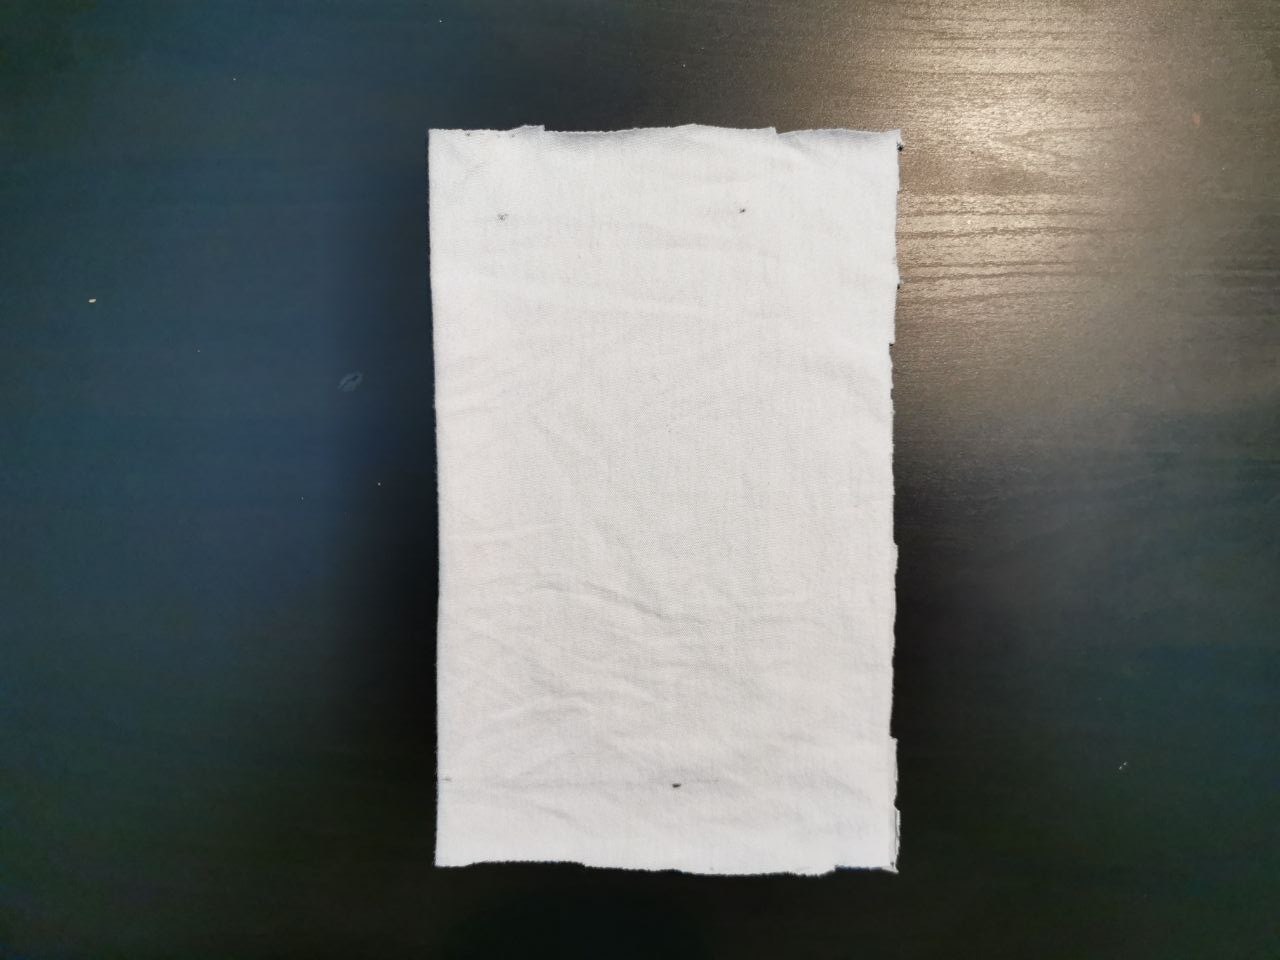
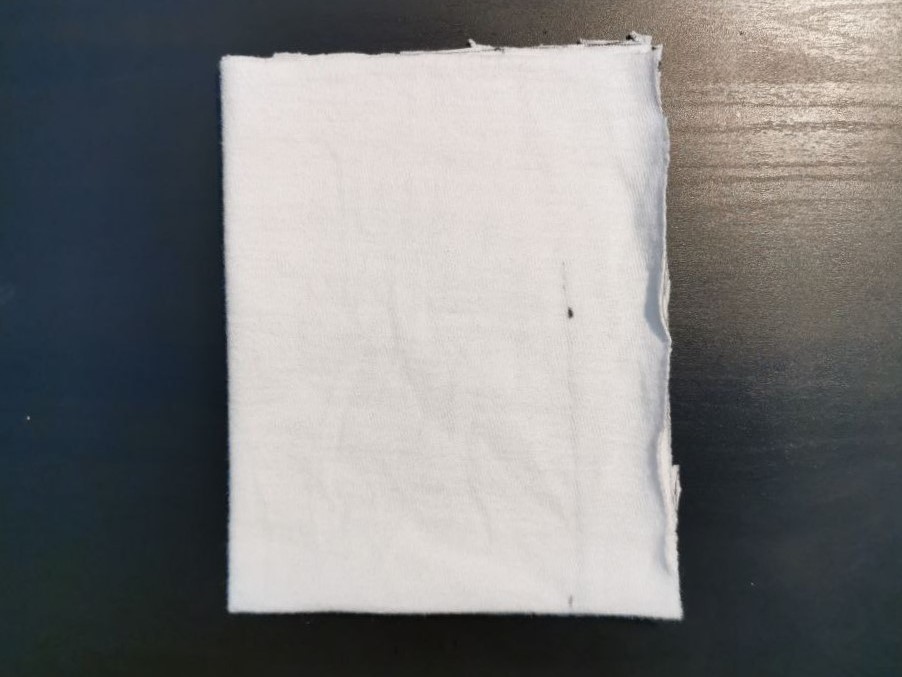
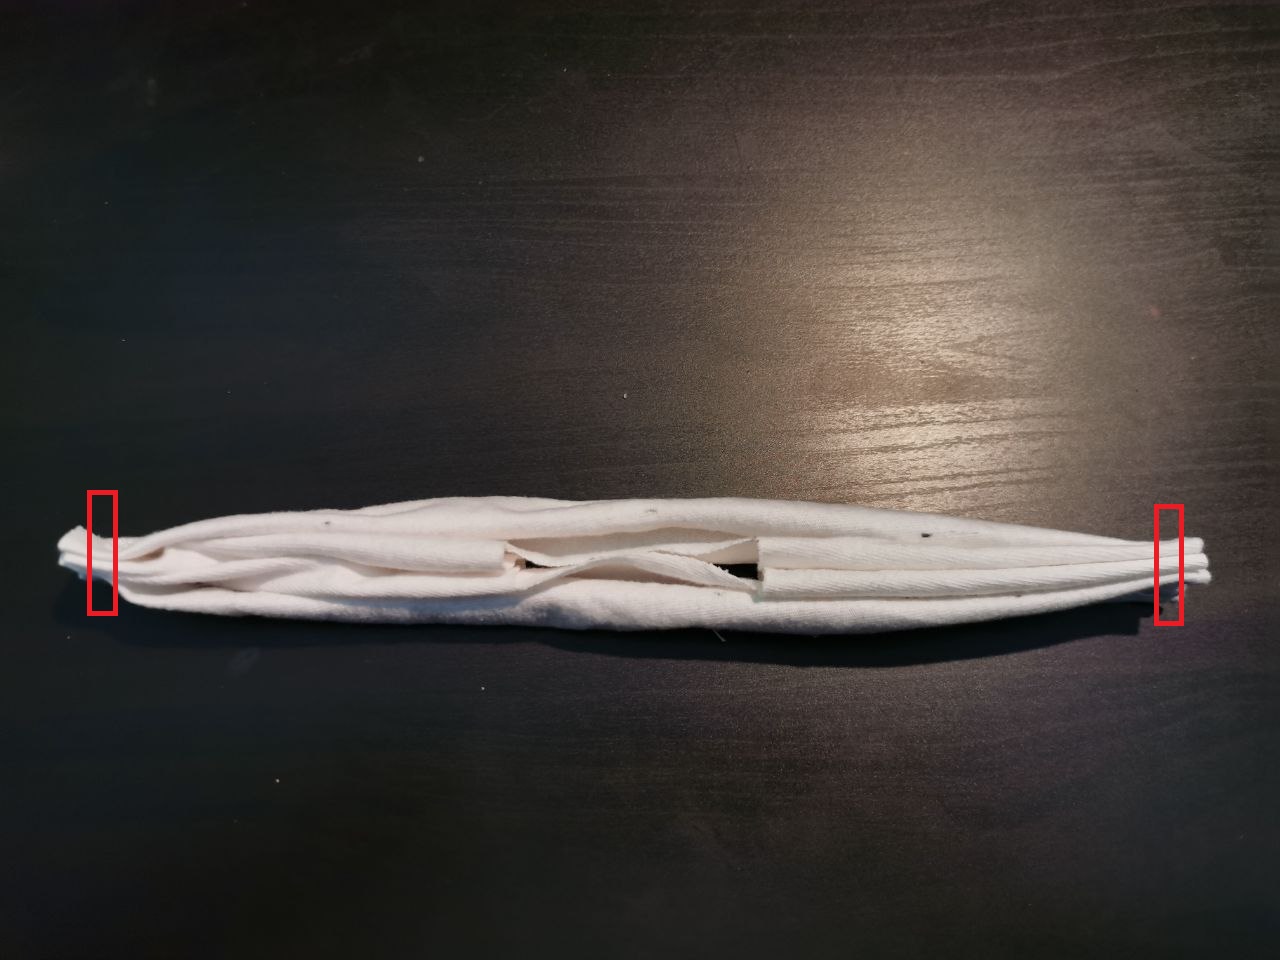
Fig 3a: Inner Layer Folded
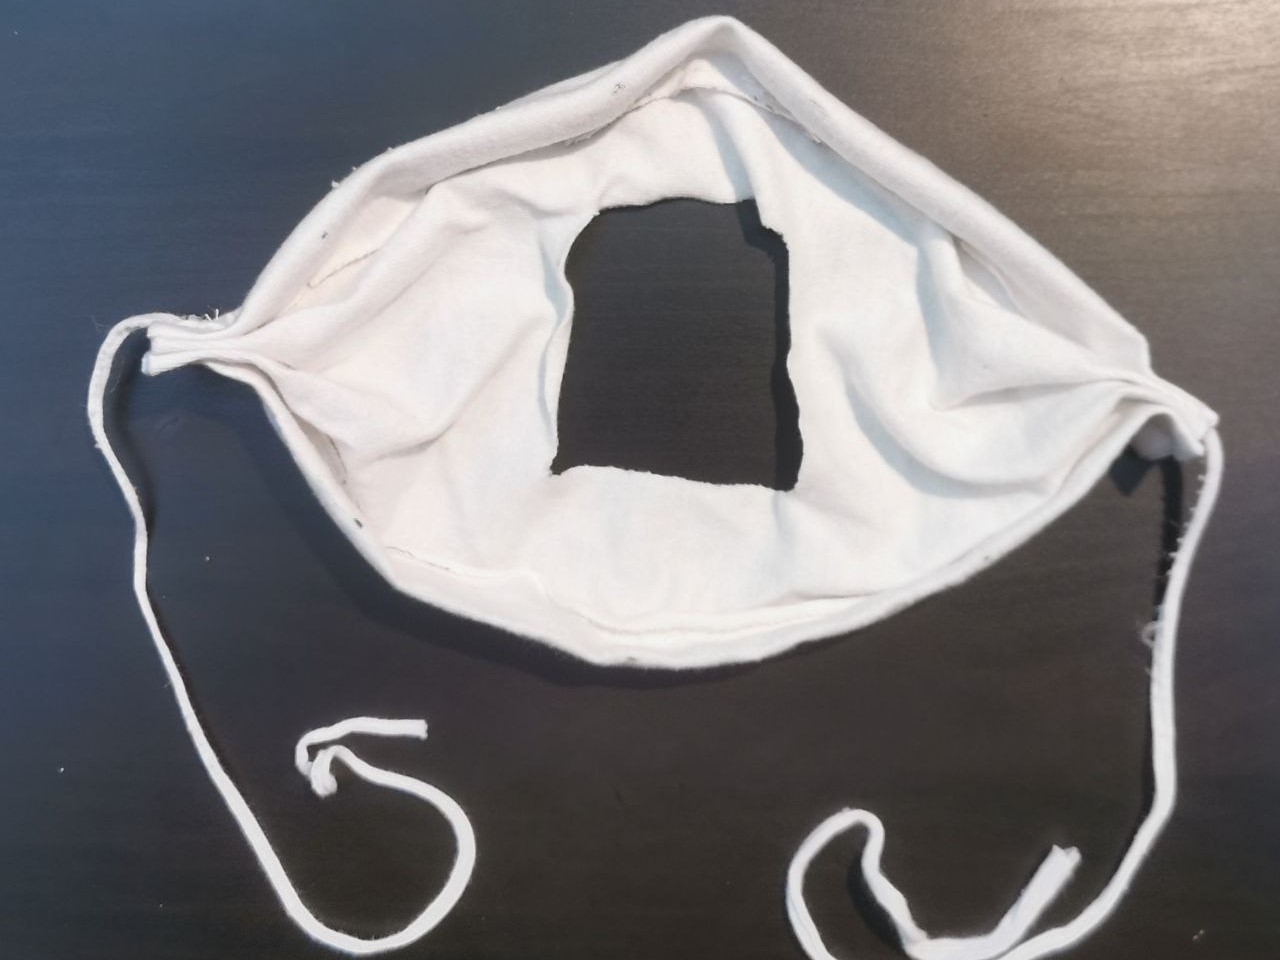
Fig 3b: Inner Layer Expanded
Outer Layer
The main filtering is done through the outer layer. The outer layer helps to further close the gaps left by the first layer and also stabilizes the inner layer.The outer layer has two embedded elastic bands that enable tighter fitting.
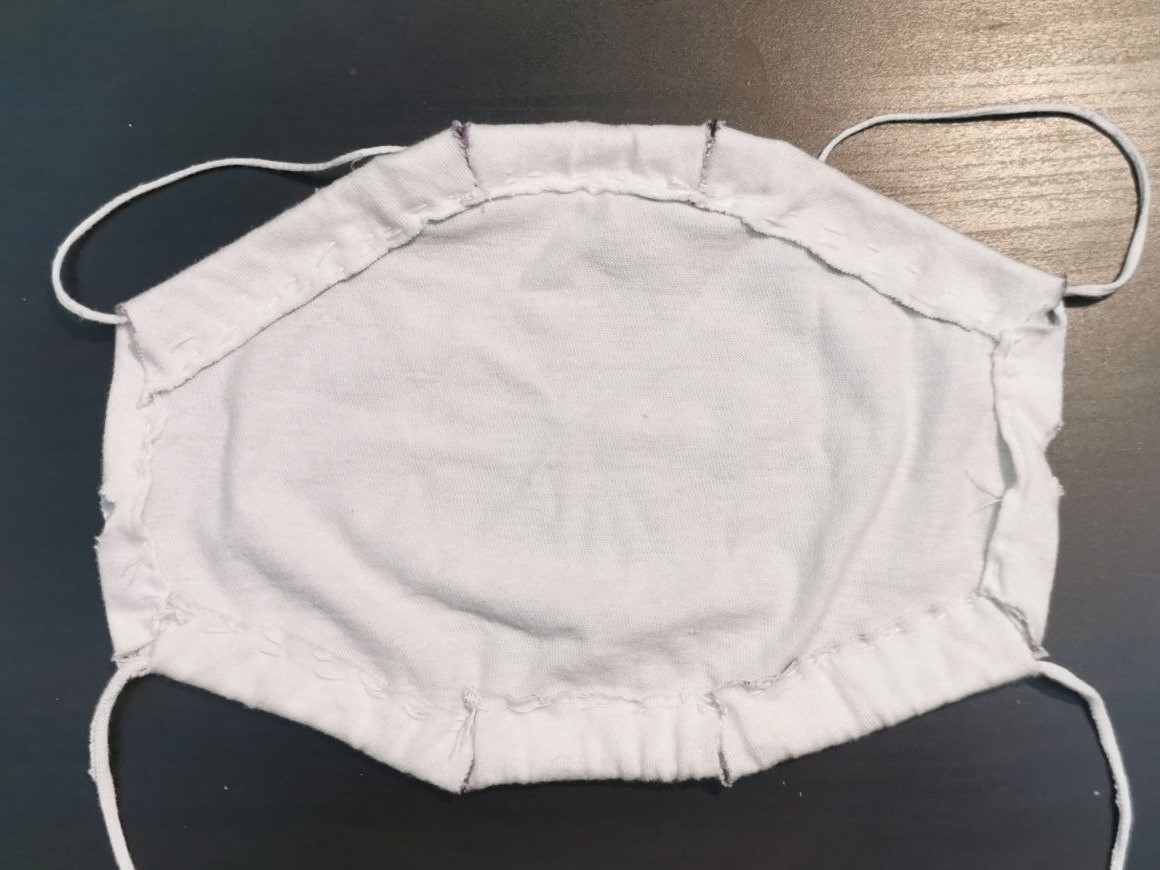
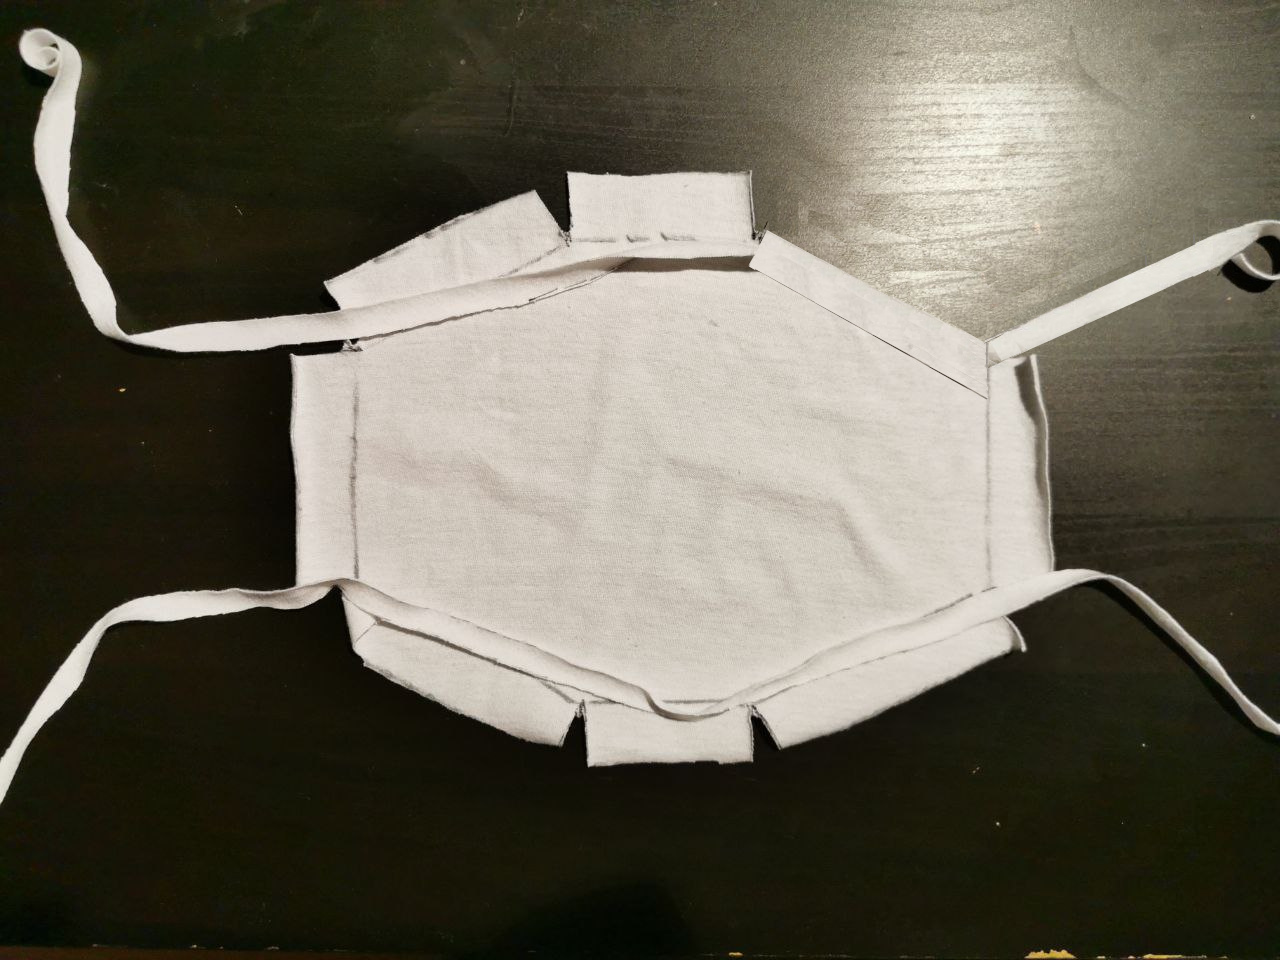
Fig 4: Outer Layer
Fabrication Instructions
Overview
The building instructions are broken down into:
-
Preparation:
-
Size Selection
-
Materials
-
Tools
-
Layout
-
Fitting mechanisms
-
-
Inner layer fabrication
-
Outer layer fabrication
-
Total Assembly
-
Filter Installation
Preparation
Size Selection
There are designs for 3 separate sizes of Small, Medium and Large. To identify the closest fit, refer to Appendix 1.
If you have a printer, you can download and print the provided stencils from Appendix 3. Otherwise, you can refer to the design diagrams from Appendix 2.
Materials
-
100% Cotton Fabric
-
Use an old (or new) 100% cotton clothing such as a shirt, t-shirt or button shirt:
-
2x rectangles (29.7 cm x 21.0 cm: A4 size paper)
-
2x strips (30 cm x 1 cm) (see Preparation section)
-
2x strips (60 cm x 1 cm) (see Preparation section)
-
-
-
Aluminum foil: A4 paper size (29.7 cm x 21.0 cm)
-
Paper clips or alternatives such:
-
wires
-
christmas ornament hangers (make sure to wrap it in aluminum foil)
-
aluminum can: cut strips (make sure to cover the edges)
-
folder fastener
-
twist ties
-
-
Additional filter material such as:
-
Paper towel
-
Microfiber (better alternative than paper towel)
-
PM0.3 HEPA filter (Ideal but rare)
-
Surgical mask
-
-
Optional:
-
Knit elastic bands (2x 30 cm long strips + 2 x 60 cm long strips)
-
Shoe laces (2x 30 cm long strips + 2 x 60 cm long strips)
-
Tools
-
Sewing needle and strand (Optional: If sewing machine is available, then use sewing machine)
-
Ruler (Only If you cannot print the stencils from Appendix 3)
-
Scissors
Fitting Mechanism
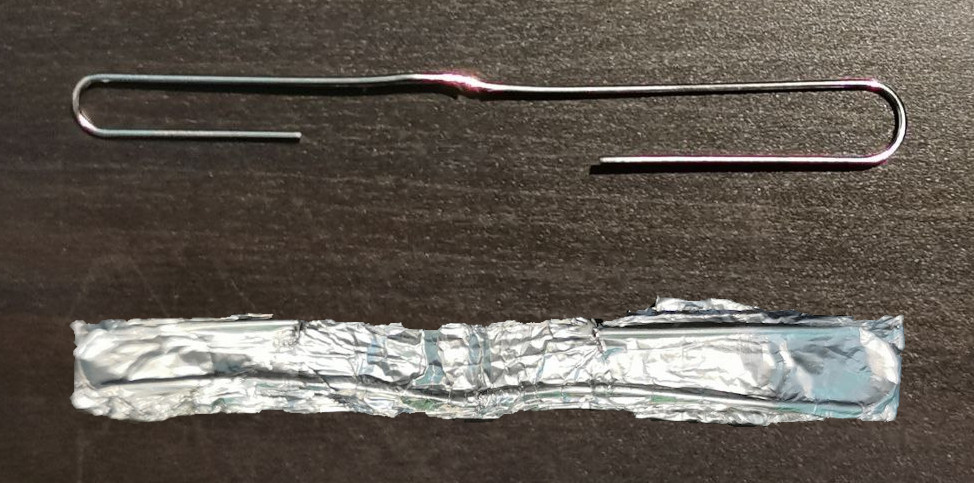
1. Expand a large paper clip as shown above and wrap it in aluminum foil. Alternatively, use a piece of wire about 10-15 cm long.
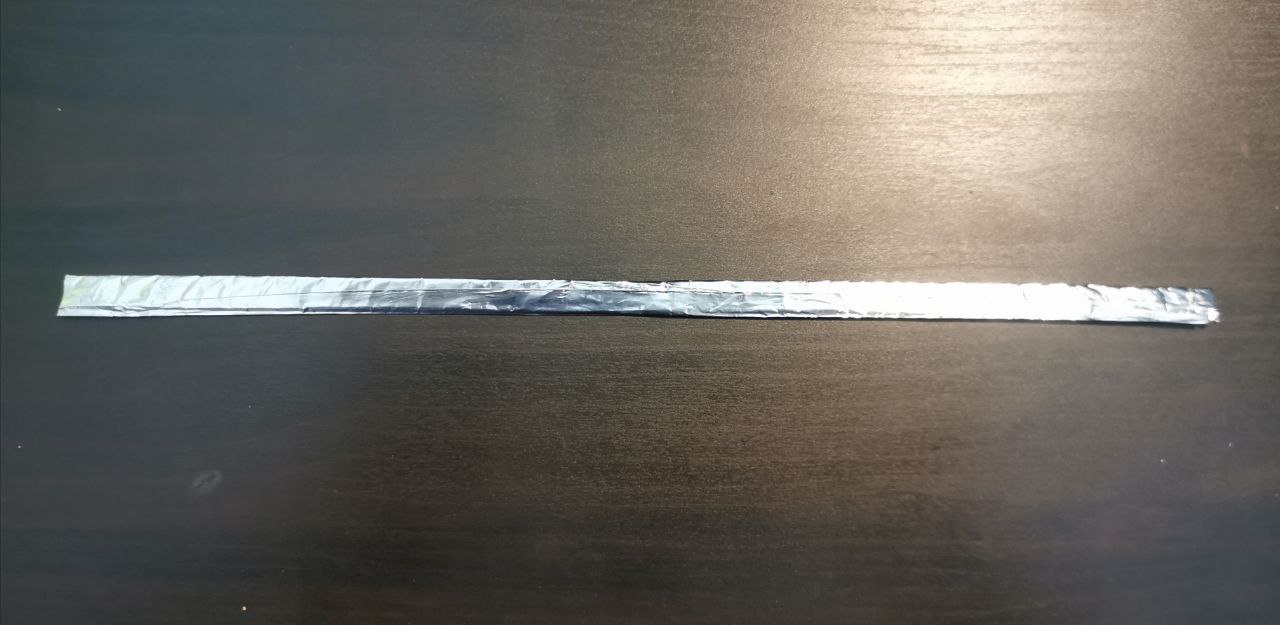
2. Roll a letter size paper (~ 27 cm x 21.0 cm) aluminum foil along its length. The end result should be 0.8 cm - 1.0 cm thick and 21.0 cm long. This will be embedded into the fabric of the mask’s inner layer to assist with facial fitting.
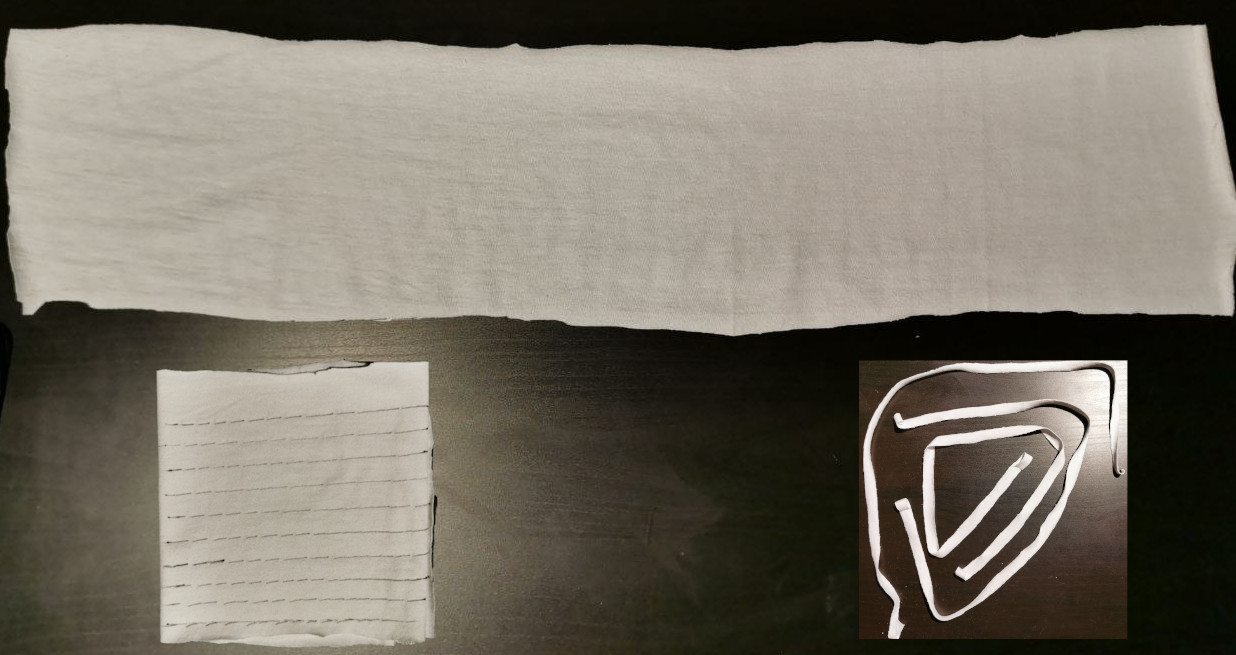
3. Cut a 60 cm x 6 cm rectangle from a 100% cotton fabric. Fold it along its length so that you end up with a 10 cm x 6 cm square. Use a ruler to draw parallel lines across its length with 1 cm gaps. These lines will be used as a guide for cutting. Once cuttings are done, you will end up with uniform strips each 60 cm length and 1 cm thick. Cut one or two of them in half to have one or two pairs of 30 cm x 1 cm strips. (Alternatively, if you have knit elastic bands, use them)
Inner Layer
In this segment, there are two options:
-
Use a provided stencil under Appendix 2, as a guide to cut the fabric (requires a printer).
-
Use layouts from Appendix 1 and draw the layout onto fabric manually and then use it as a guide to cut.
|
This is the desired outcome. |
1. Cut the 100% cotton fabric into a rectangle based on the selected size (e.g. Large: 27 cm x 21 cm) |
2. Fold the rectangle in half along the length |
3. Fold the rectangle in half again along the height |
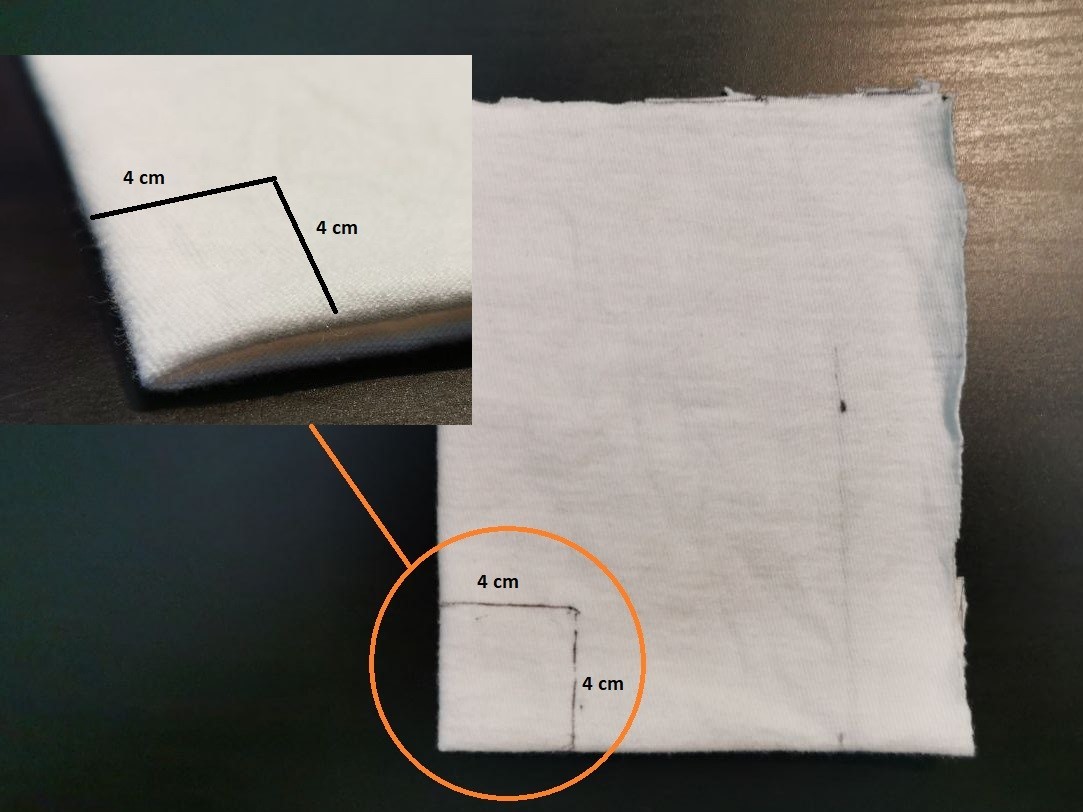
4. Mark a 4 cm x 4 cm square at the corner where the sides are folded. |
5. Cut the square with a pair of scissors. |
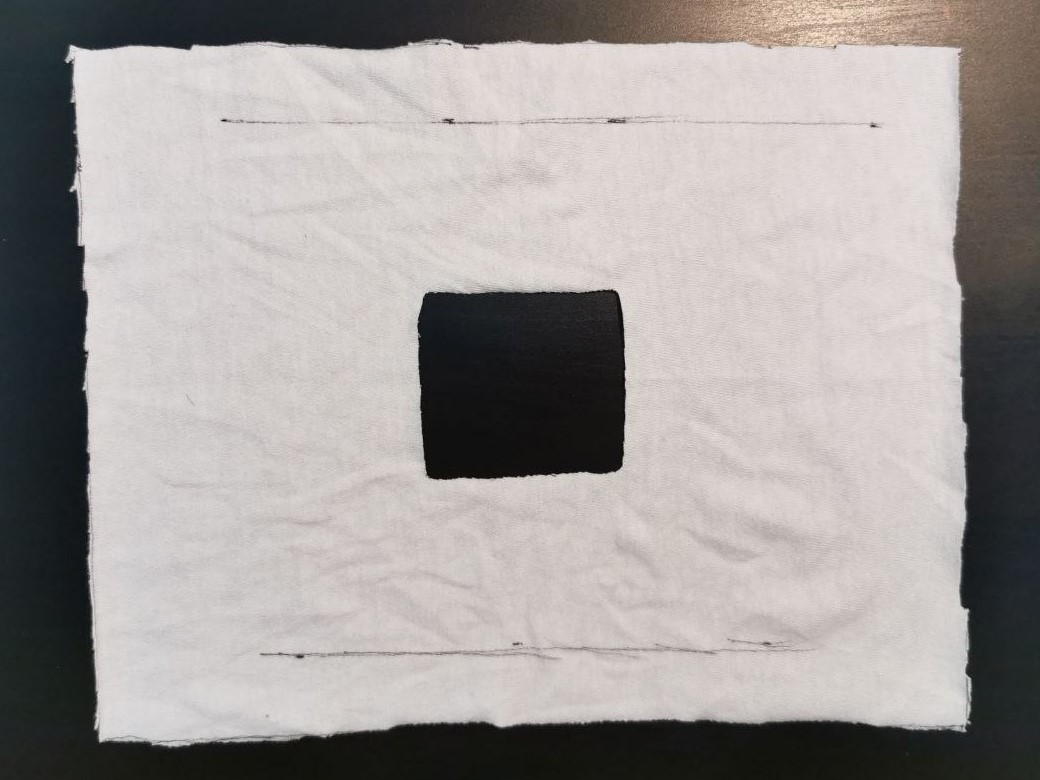
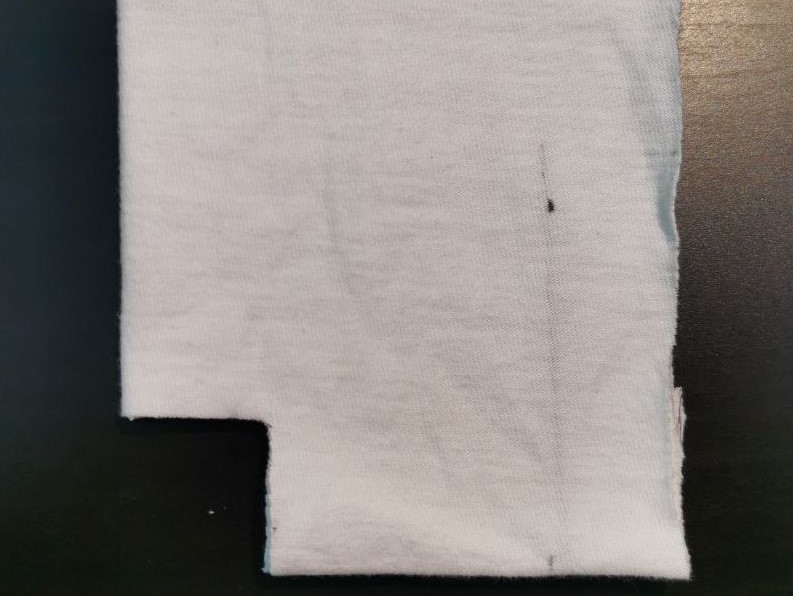
6. Unfold the fabric and the result should be a square shaped hole. |
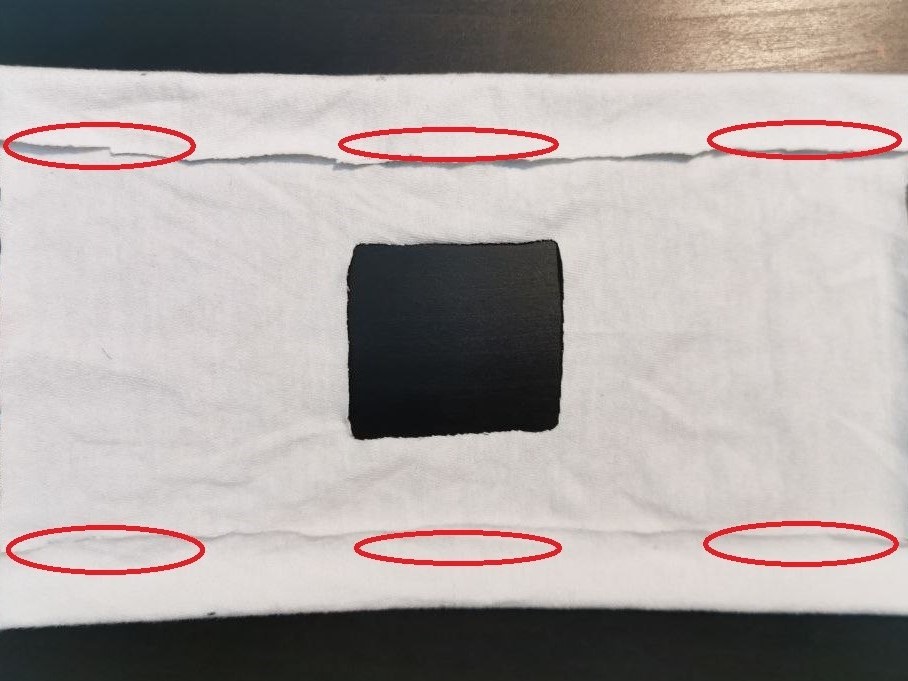
7. Sew the designated areas (~ 3-4 cm sew line is sufficient). |
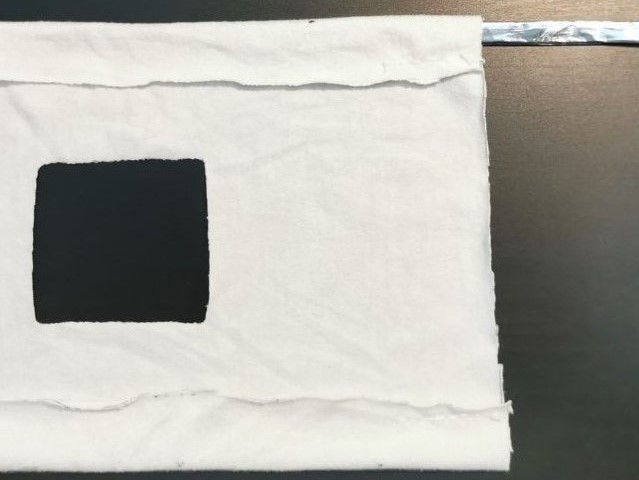
8. Insert the folded aluminum bar from either top corners. |
8.1. Centre the folded aluminum bar as shown above. |
|
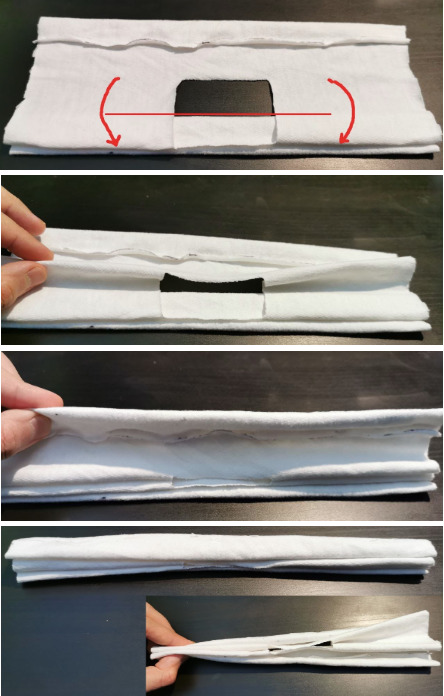
9. In this step, the fabric needs to be folded like an Accordion as shown below:
In the next step: |
|
10. Sew both ends of the folded fabric as shown. |
11. Attach a 1 cm x 30 cm strip to both left and right end. Attach the strips on the top of the rim as shown above. |
|
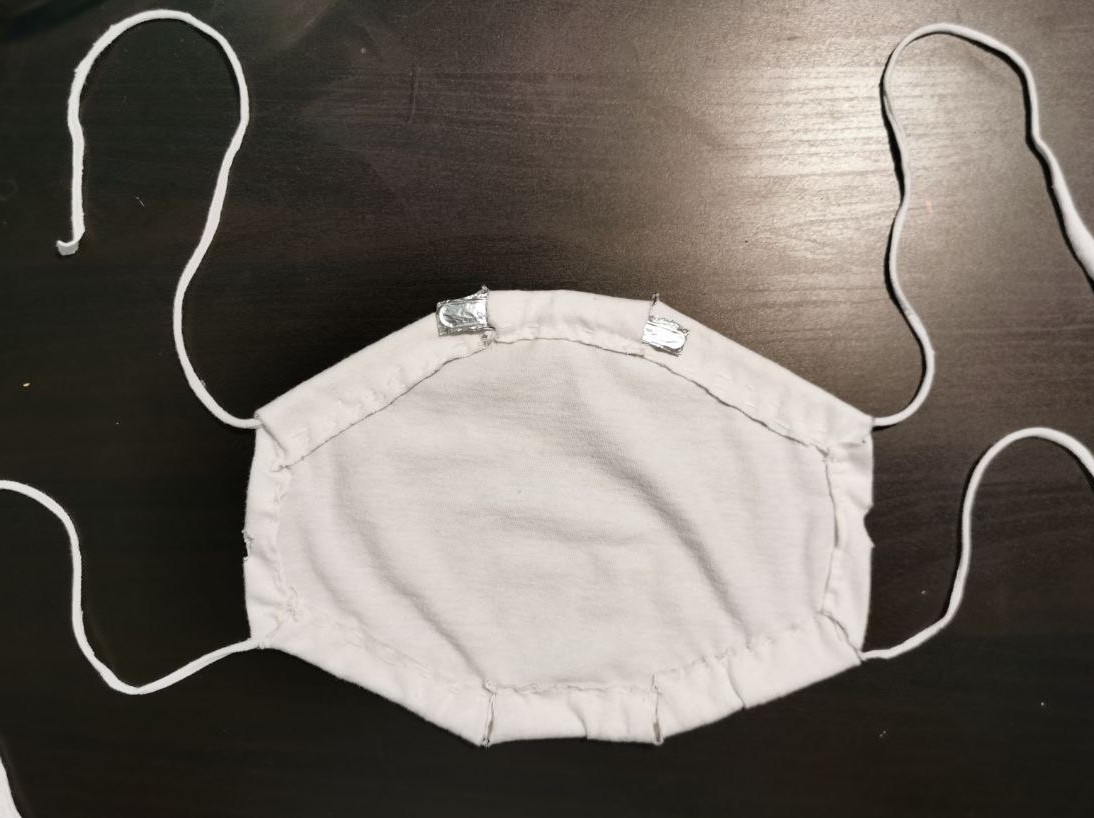
12. Expand the inner layer by pulling the top and bottom rims. This is the expected result for the mask’s inner layer:
Later, a disposable filter will be placed inside this layer to cover the square hole. |
|
Outer Layer
In this segment, there are two options:
-
Use a provided stencil under Appendix 2, as a guide to cut the fabric (requires a printer). **If you are using this option, **skip to step 9.
-
Use layouts from Appendix 1 and draw the layout onto fabric manually and then use it as a guide to cut. In this case, proceed from step 1.
This is the desired outcome. |
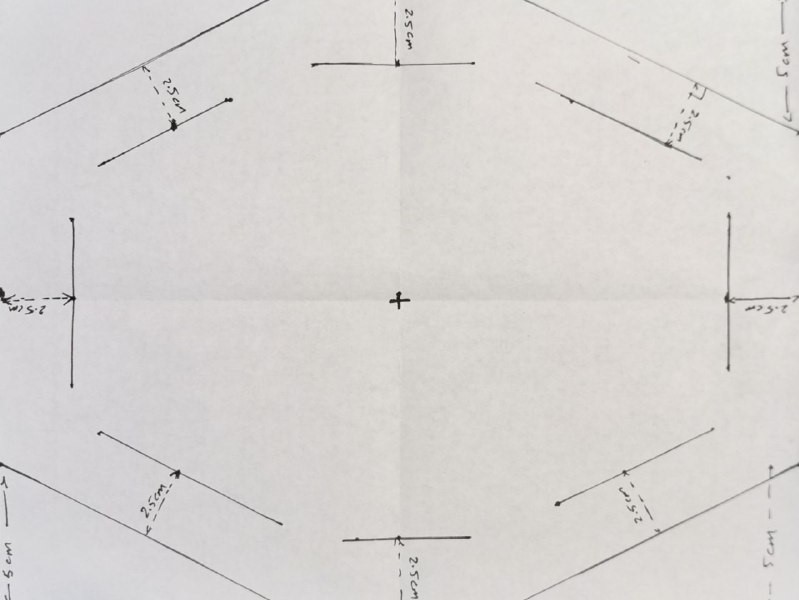
1. Draw the desired pattern from Appendix 1.2 onto a paper (e.g. letter size). You should have an outer hexagon pattern and an inner hexagon pattern with a gap of 2-2.5 cm. |
2. Cut out the excess as shown above. The idea here is to fold the outer hexagon inward along the inner hexagon’s sides. This will create a loop to pass through elastic strands. |
3. Trace the outer hexagon onto the 100% cotton fabric. Use the cutted paper as a guide by placing the cut out onto the fabric and draw around it using a marker. |
4. Draw the inner hexagon. You can start by folding along an inner hexagon’s side and drawing a line along it. Then repeat this process one side at the time. |
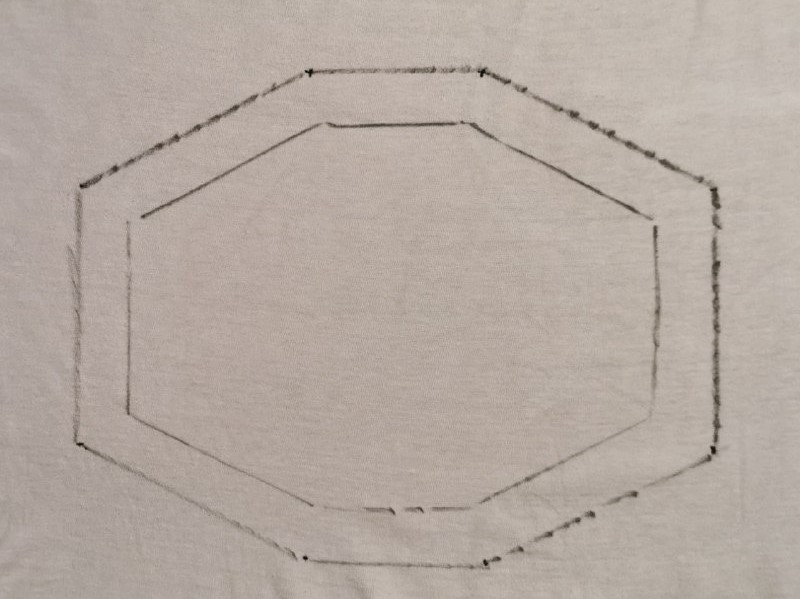
5. You should be left with a pattern like this. An outer hexagon and an inner hexagon with 2.5 cm gap between the two. |
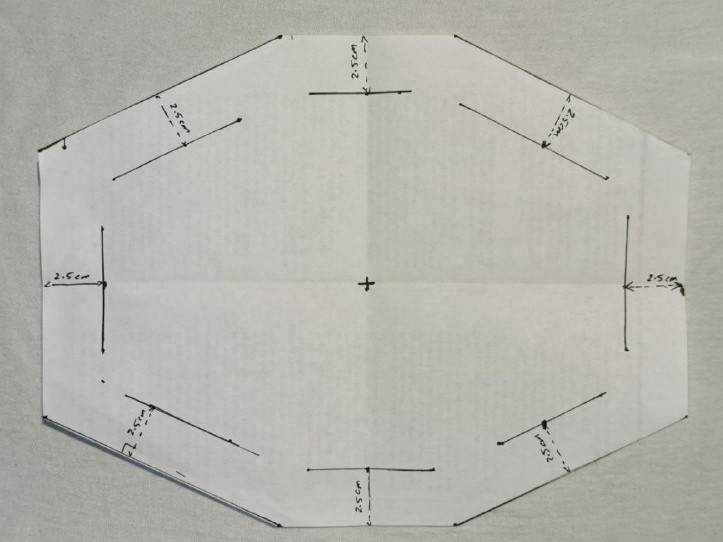
6. Cut the fabric along the outer hexagon’s sides. |
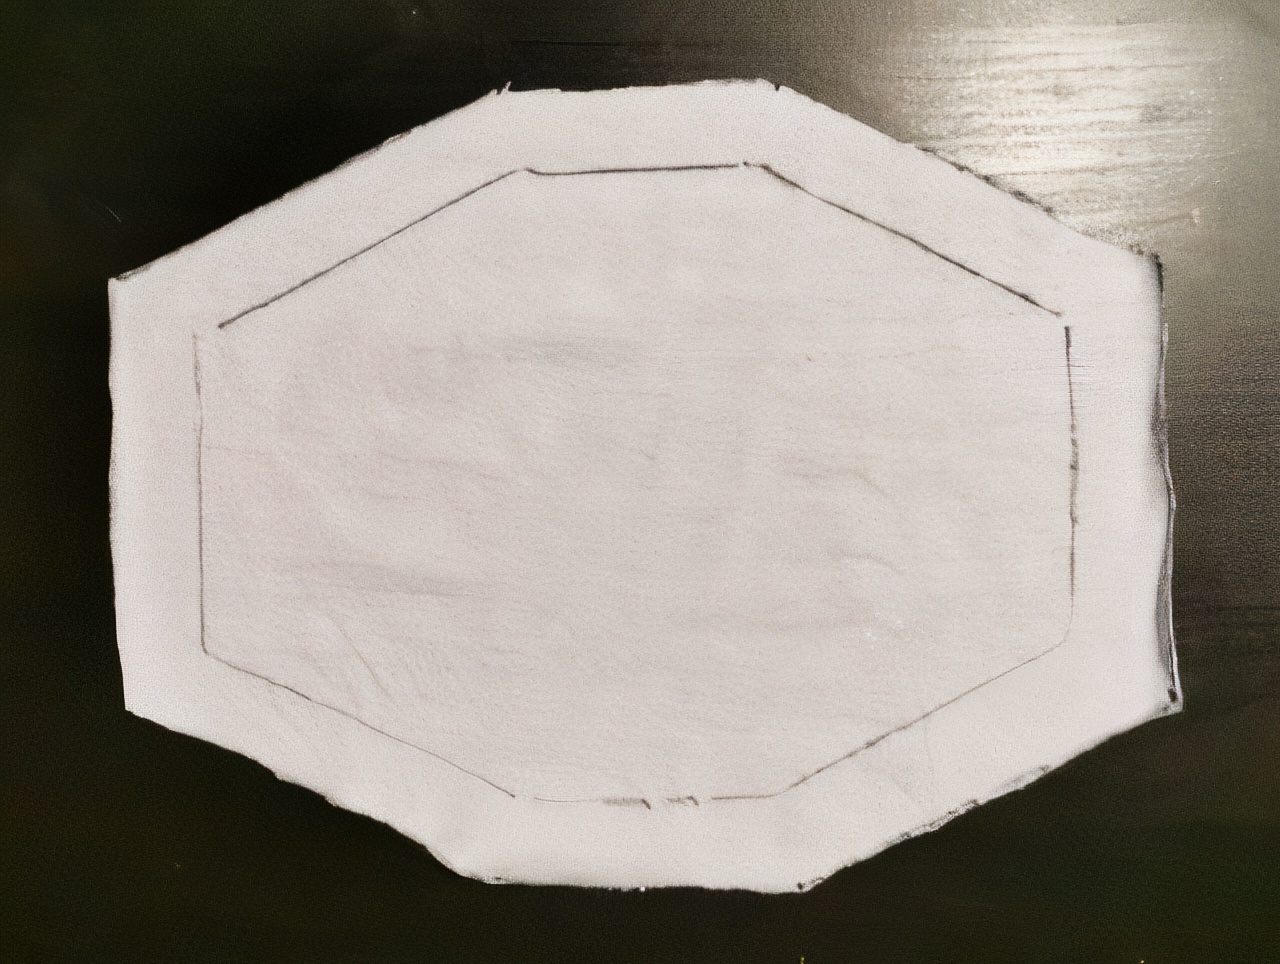
7. Draw triangles on the outside of every inner hexagon vertex. Feel free to make them wider. This will be used as a cutting guide in the next step. |
8. Cut out these triangles. I recommend making them wider if your straps are wider than a 1 cm. |

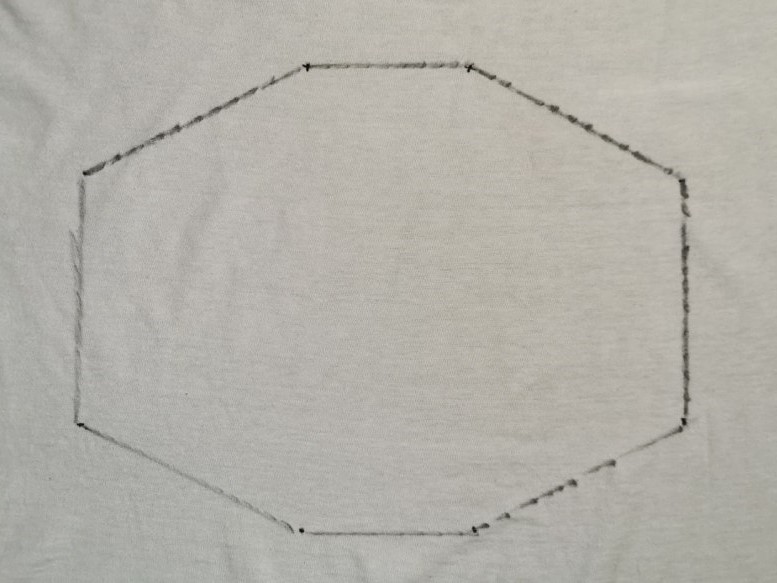
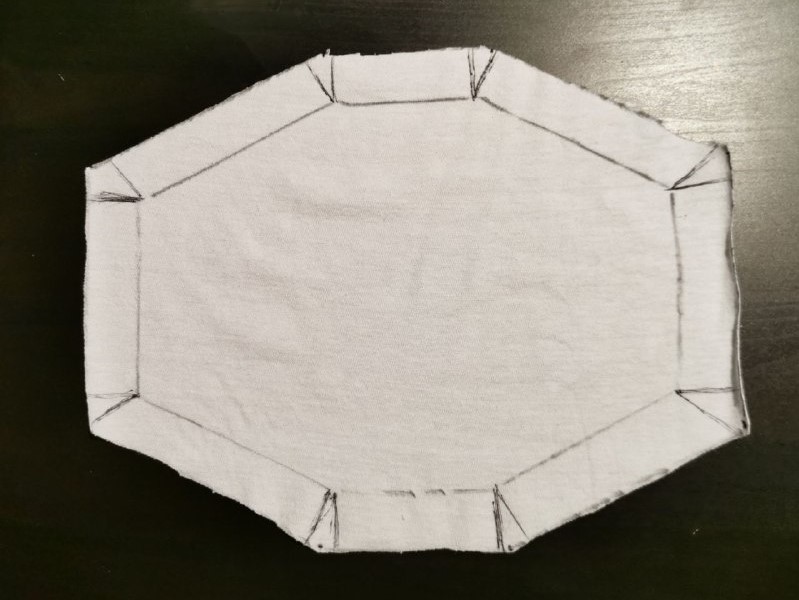
9. Place the two 60 cm x 1 cm 100% cotton strips on the upper and bottom edges of the hexagon. We are going to fold over the outer edges (flaps) along the inner hexagon and sew them onto the fabric. This will create a “tunnel” for the strips to pass through freely. |
10. Fold over the top right edge (flap) and sew it to the fabric without sewing the stripe. Then Skip the top centre flap and sew the other flaps to the fabric without sewing the stripe. |
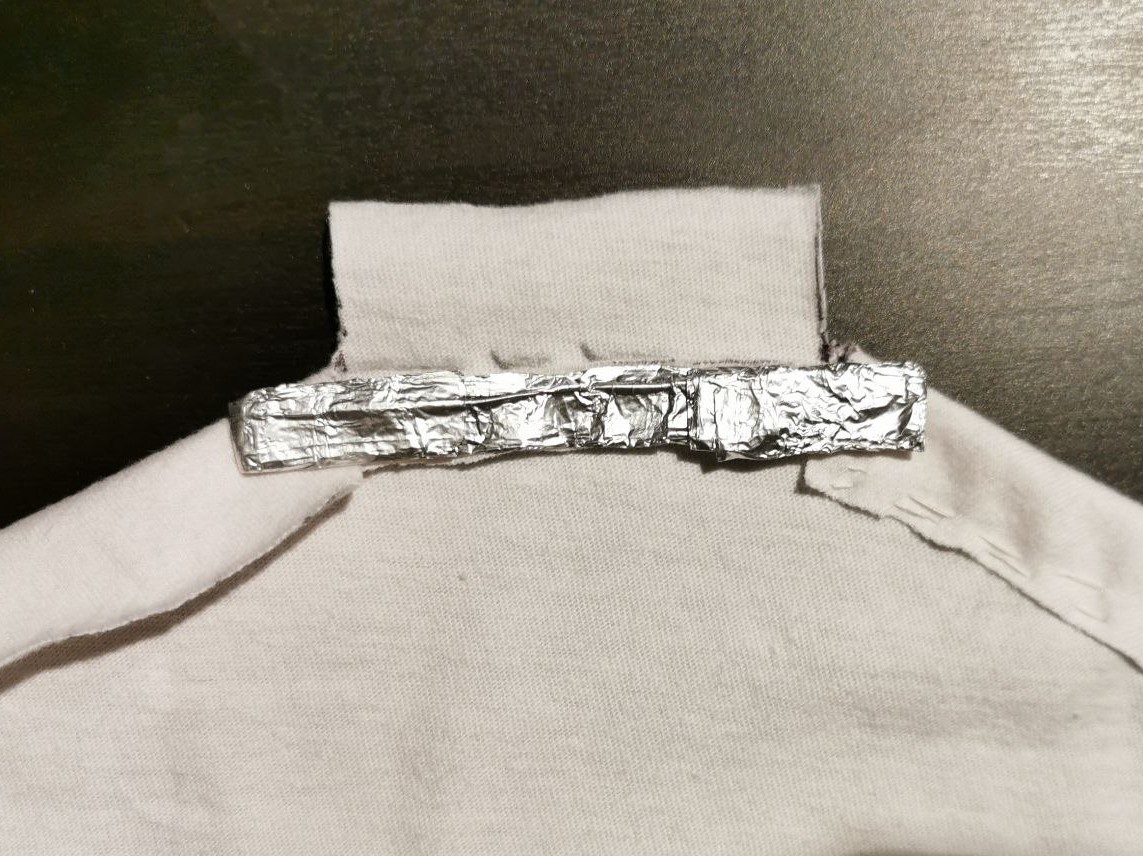
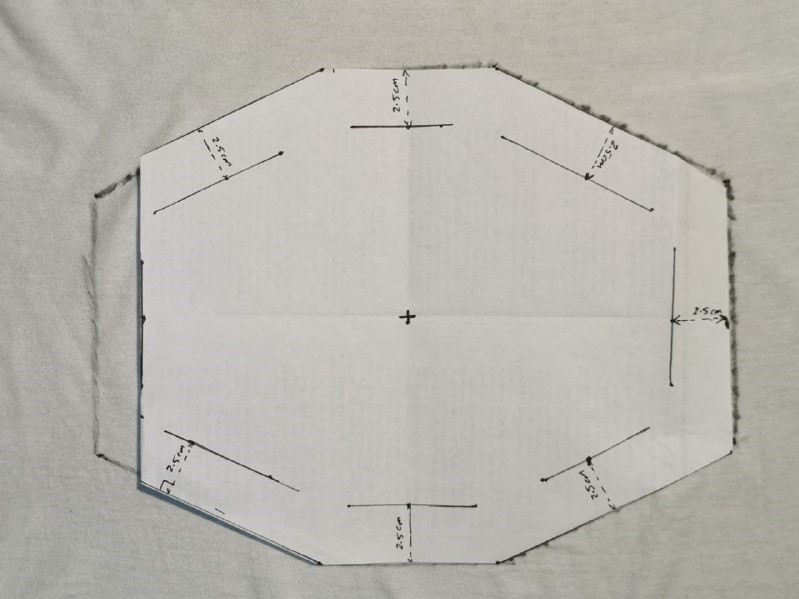
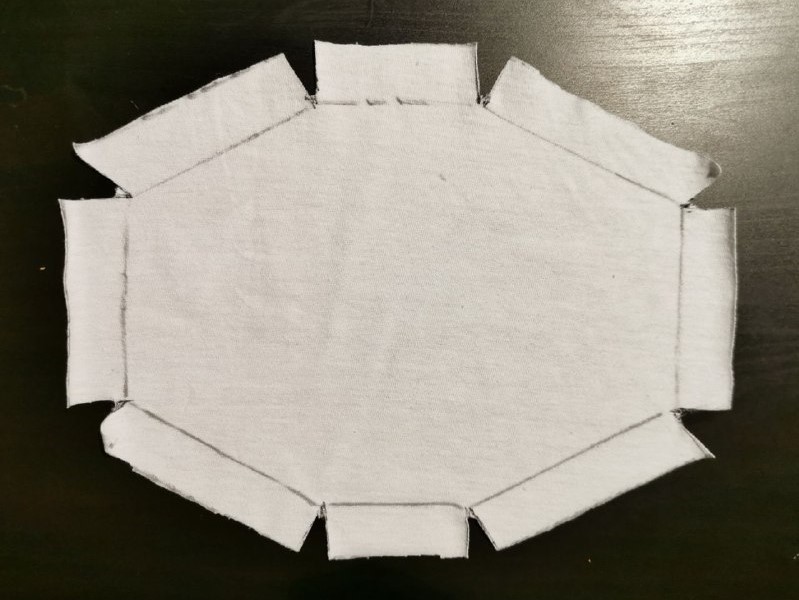
11. Place the wrapped paper clip at top as shown and stitch the top flap onto the fabric. |
|
12. The result should look like this. |
Optional: You can also hide the remaining portions of the wrapped paperclip by sliding them under the neighboring flaps as shown above. |
Layer Integration
It is time to integrate the two layers:
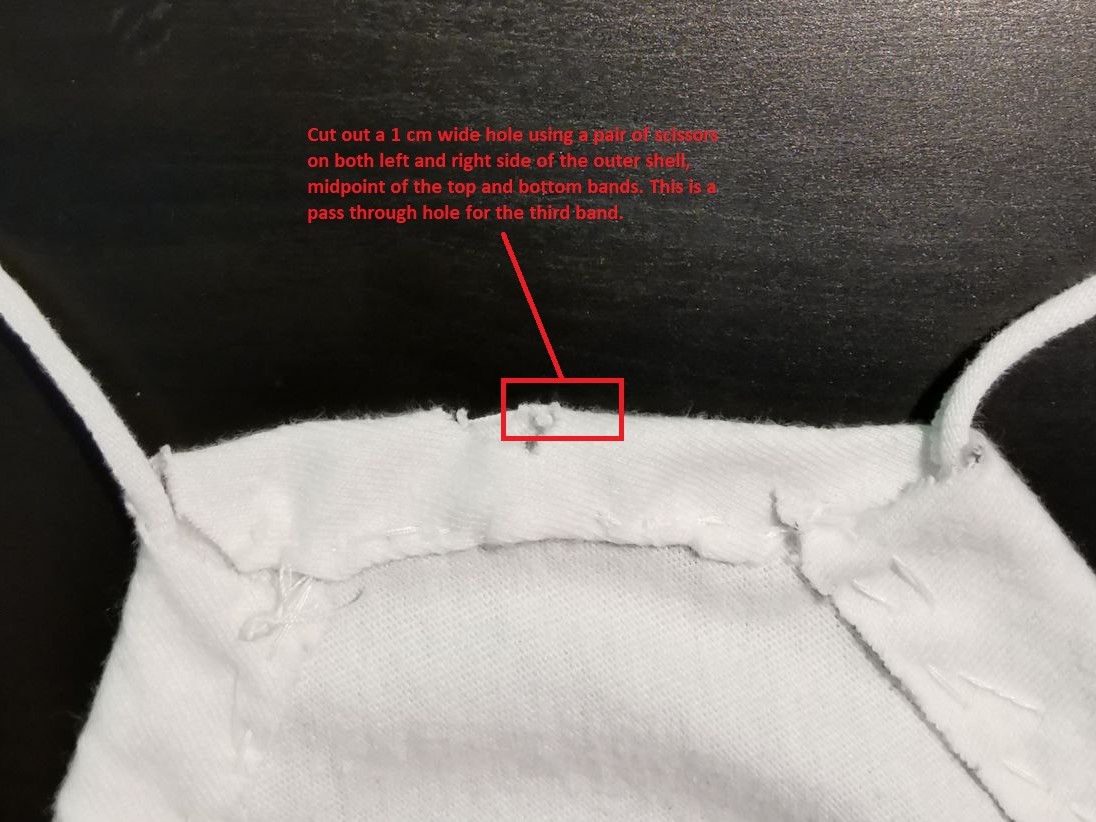
1. Cut out two, 1 cm wide holes, on both left and right sides of the outer shell, midway between top and bottom strips. |
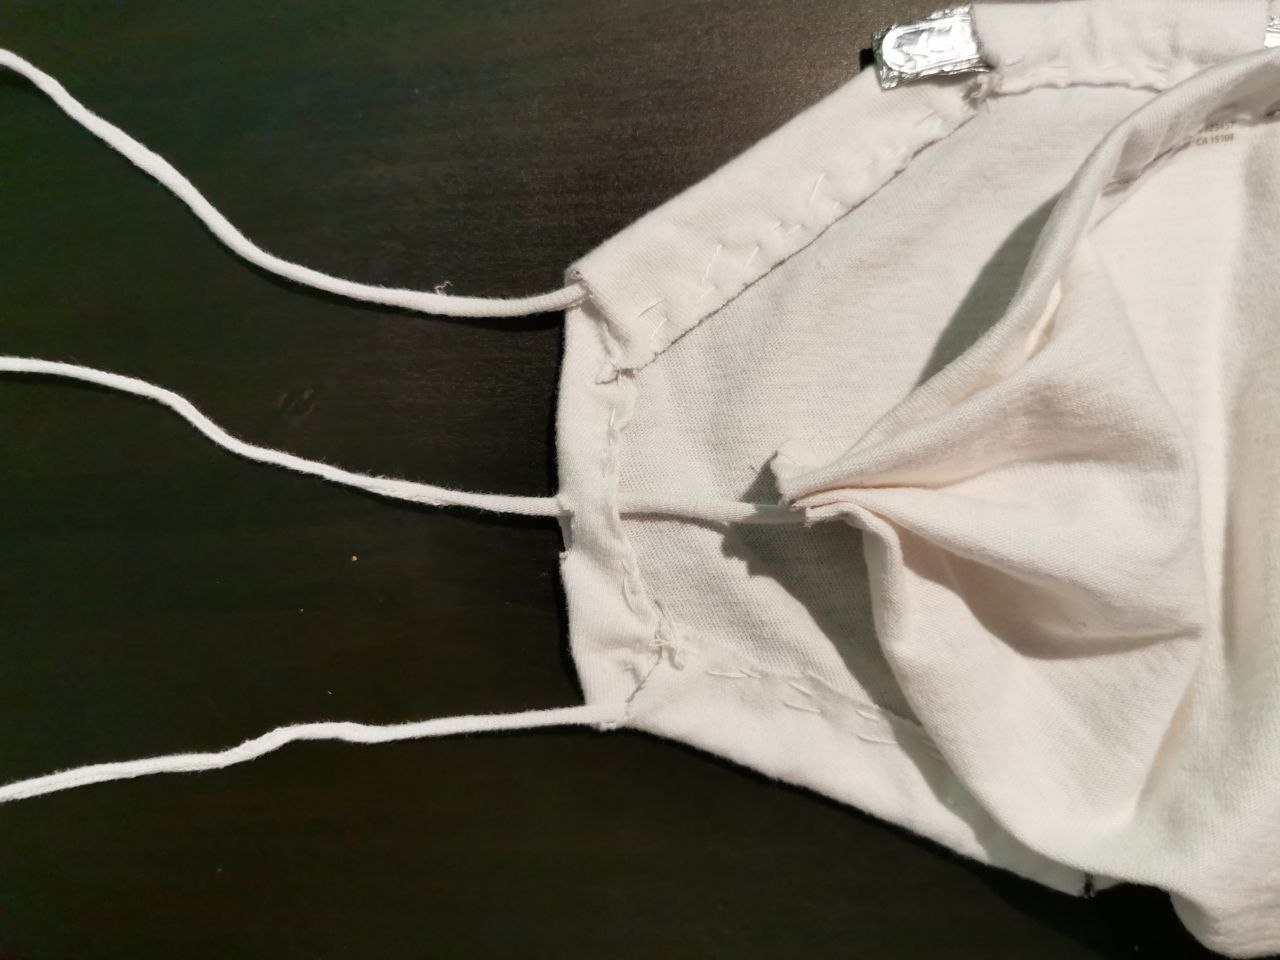
2. Pass through the two strips from the inner shell on both left and right openings. Please note that the embedded folded aluminum piece should face up and should line up with the paper clip nose clamp of the outer shell. |
|
3. The final result should look like this:
In the next step, the secondary filter will be inserted. |
|
Disposable Filter Insertion
Use any of the followings materials:
- Paper towel
- Microfiber (better alternative than paper towel)
- PM0.3 HEPA filter (Ideal but rare)
- Surgical mask
Fold them or cut them if necessary so that they can fit inside the inner layer. Use the inner layer’s rims as a means to stabilize the inserted filter. In the example below, a paper towel was folded in half first and the corners were folded again to better match the inner layer’s silhouette:
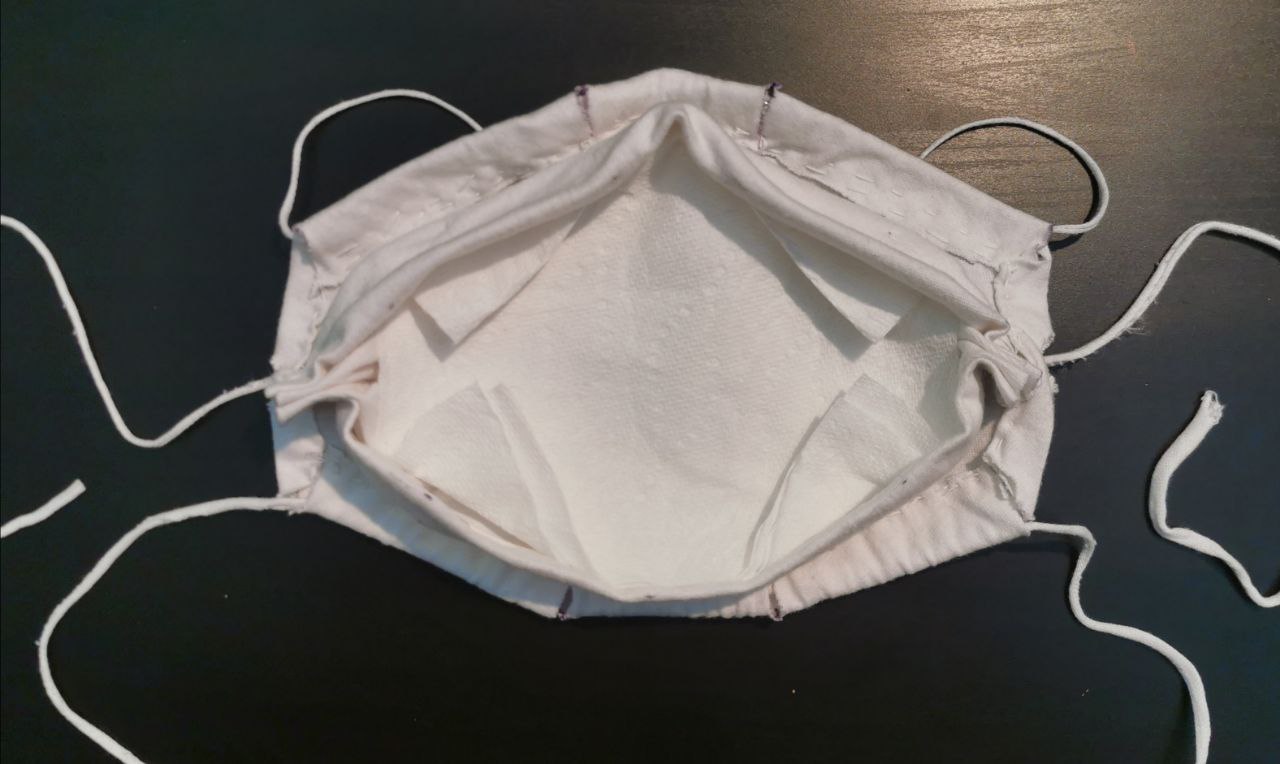
Fig 5: Paper towel is used as a disposable secondary filter inside the inner layer.
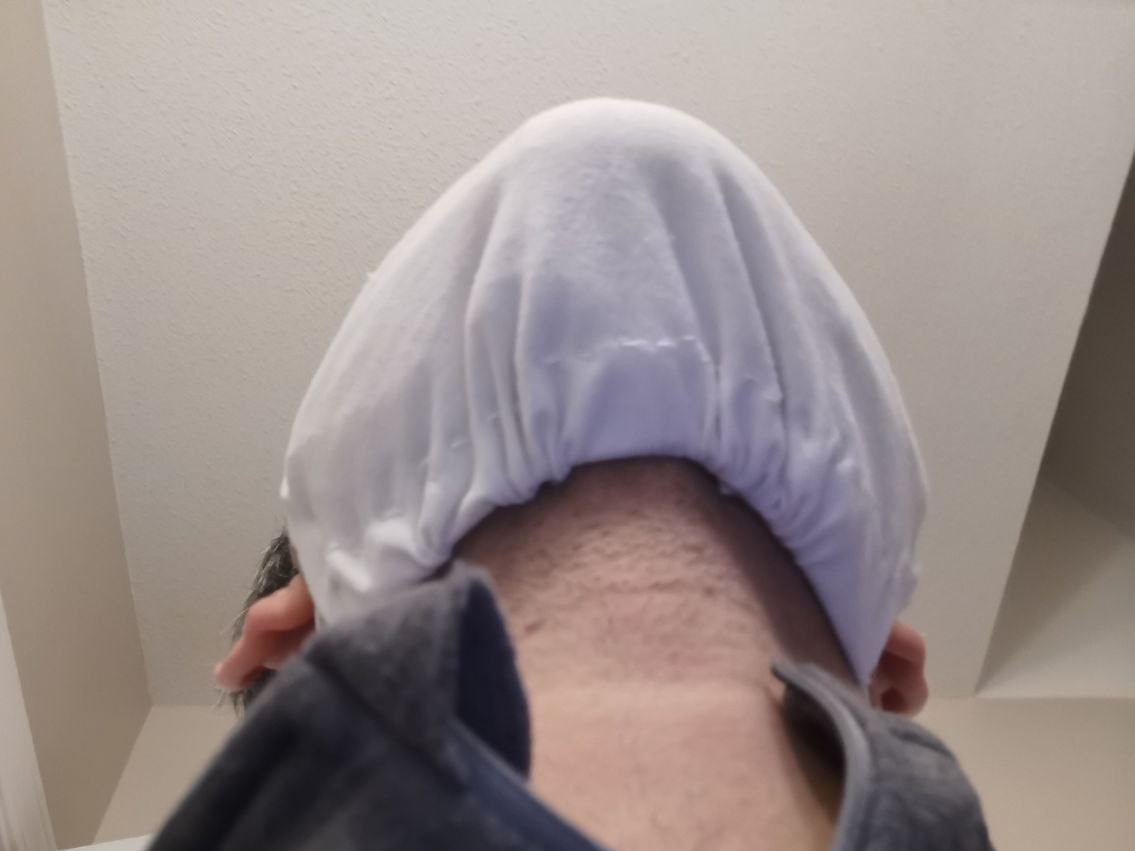
Wearing Instructions
1. Place the mask on the face and adjust the upper rim of the inner layer to conform to your face geometry.
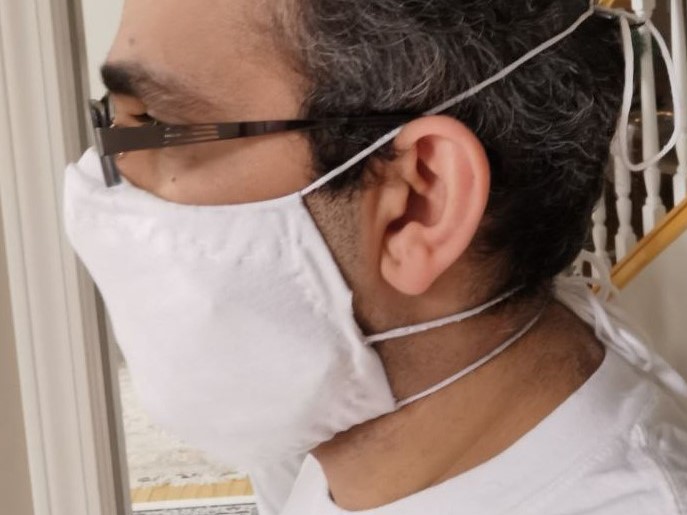
3. Wrap the top band around the top of your ears. 4. Wrap the middle band just beneath your ears. 5. Wrap the bottom bands so that they go around the back of the neck. |
2. Pass through the two strips from the inner shell on both left and right openings. Please note that the embedded folded aluminum piece should face up and should line up with the paper clip nose clamp of the outer shell. |
Fit Checking Instructions
It is now time to check the goodness of fit:
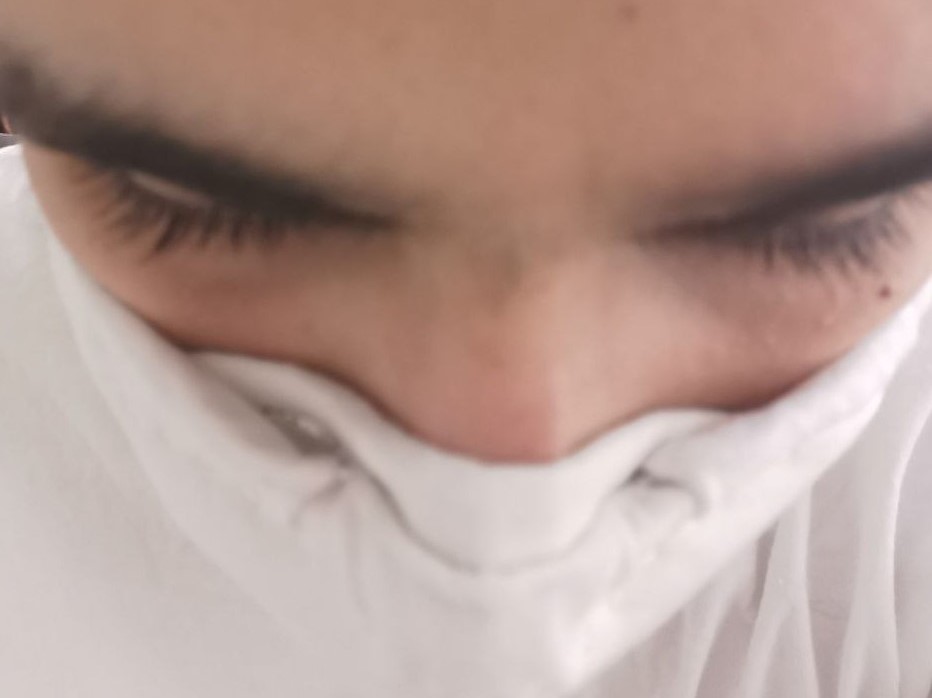
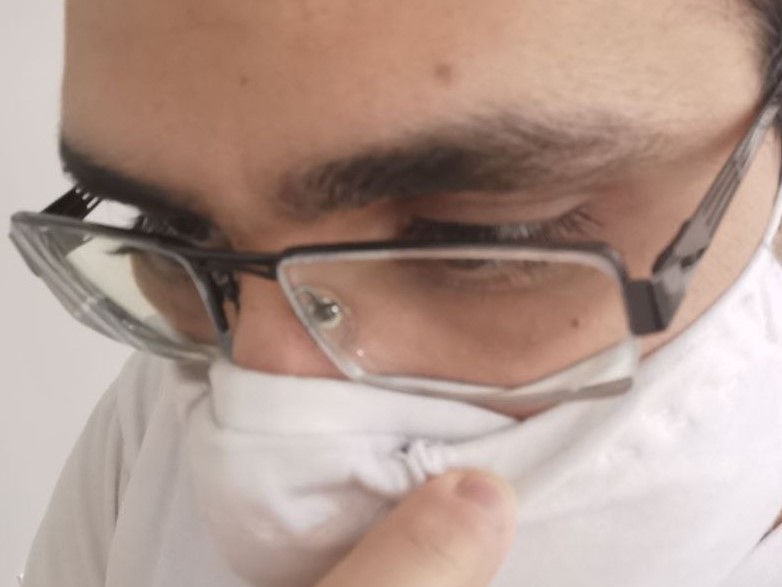
1. Nose: Ensure tight fitting around the nose area by the outer layer as well as the inner layer. Use the nose clamp and top bands/straps to achieve snug fit. |
2. Jaw Line: Ensure tight fitting just below the jaw line. The bottom bands/straps can be adjusted to achieve snug fit. |
|
3. Sides: Ensure snug fitting through adjustment of middle bands/straps. |
Appendix
1. Sizes
Three sizes are provided for this mask, these are:
| Size | Small | Medium | Large
(Reference) |
| Scale | 80% | 90% | 100% |
| Outer Layer
Dimension Approx.
(Sideburns to Sideburns) |
184 mm | 207 mm | 230 mm |
2. Design Layout
Small
Inner Layer Dimensions
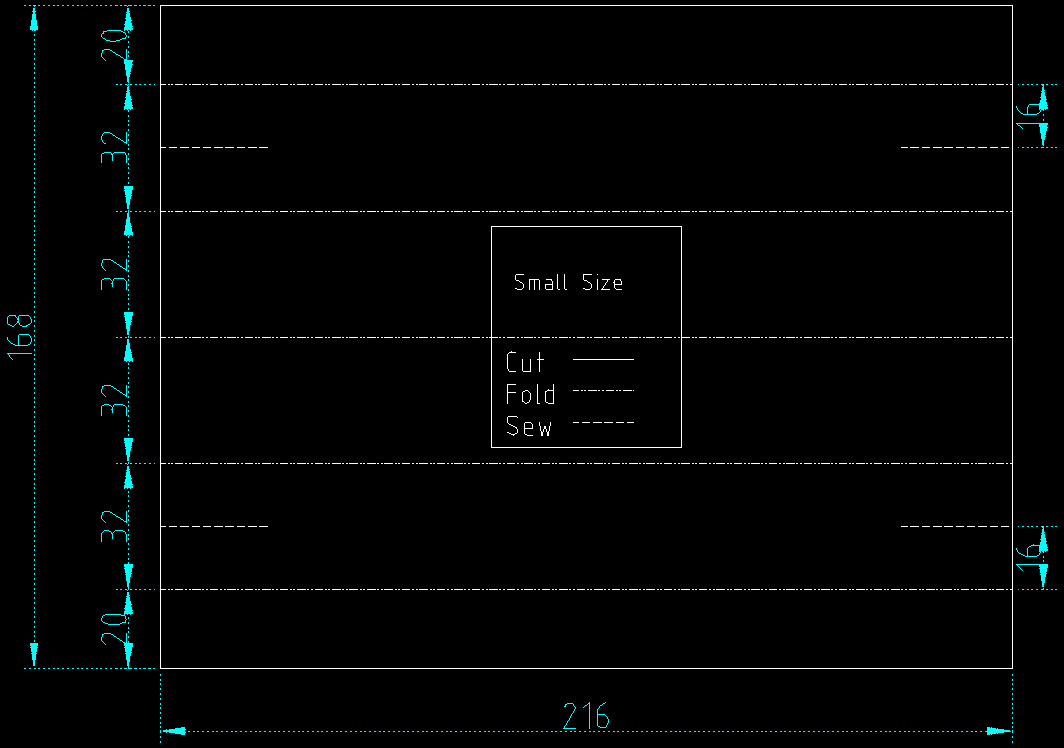
Small Size - Inner Layer
Outer Layer Dimensions
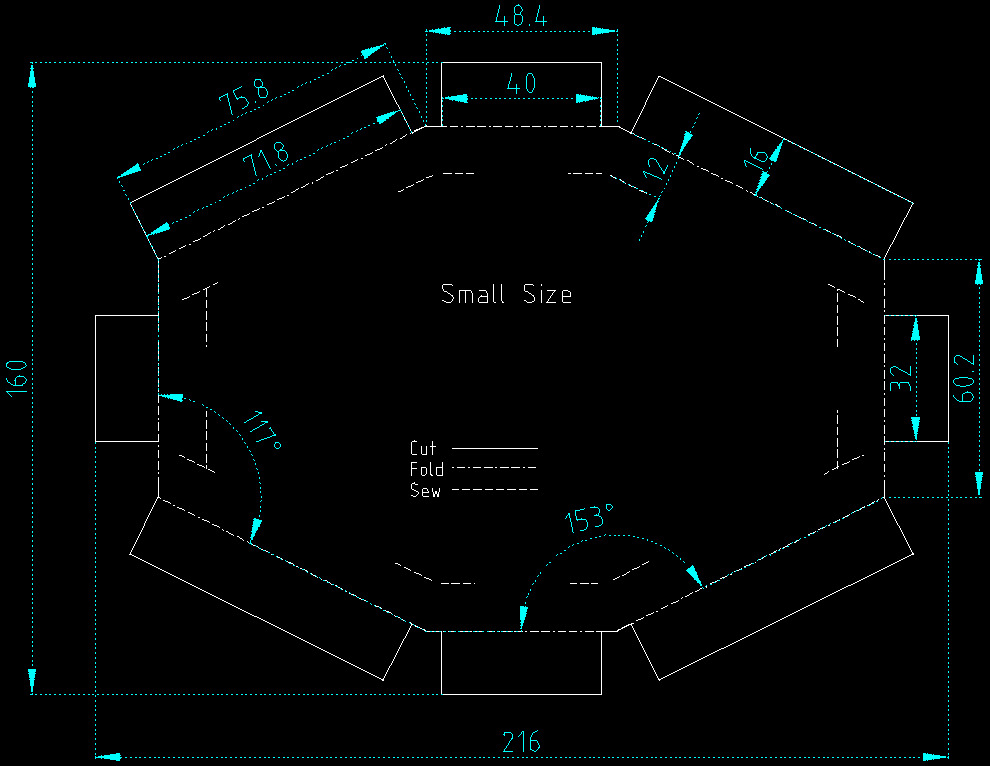
Small Size - Outer Layer
Medium
Inner Layer Dimensions
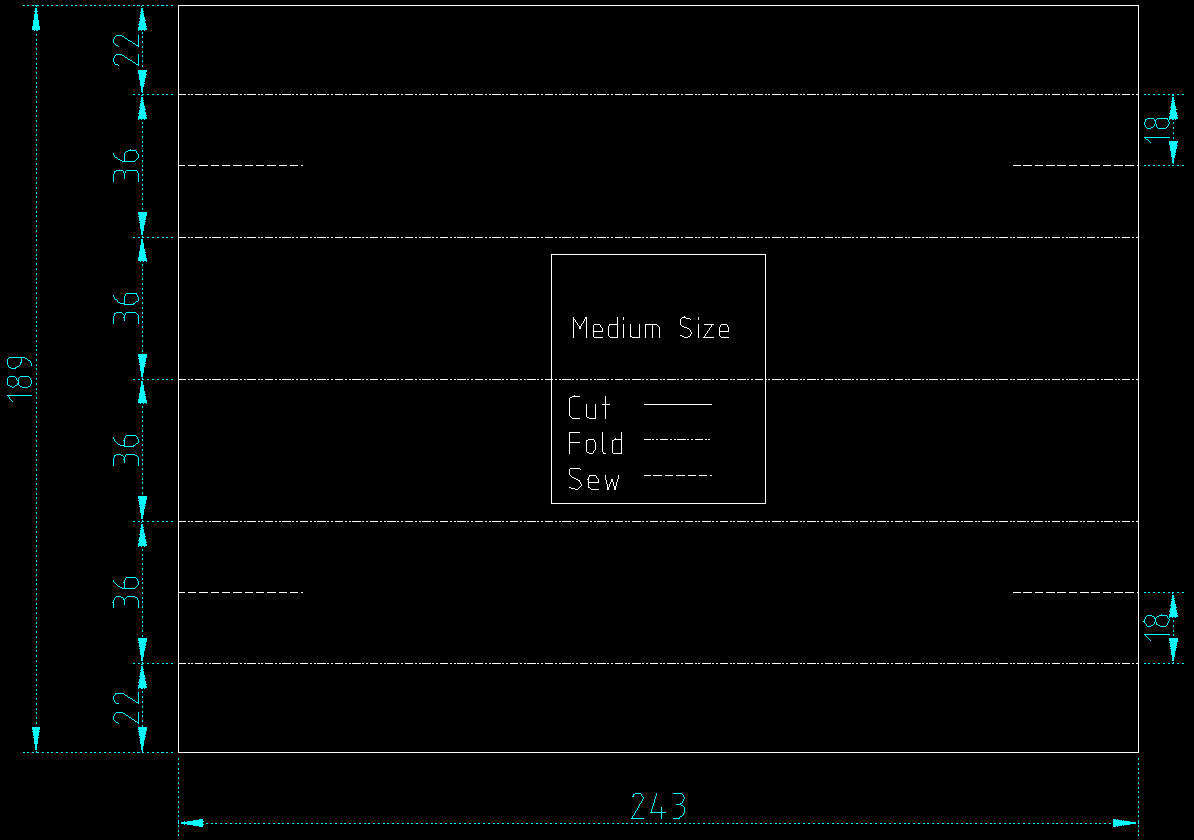
Medium Size - Inner Layer
Outer Layer Dimensions
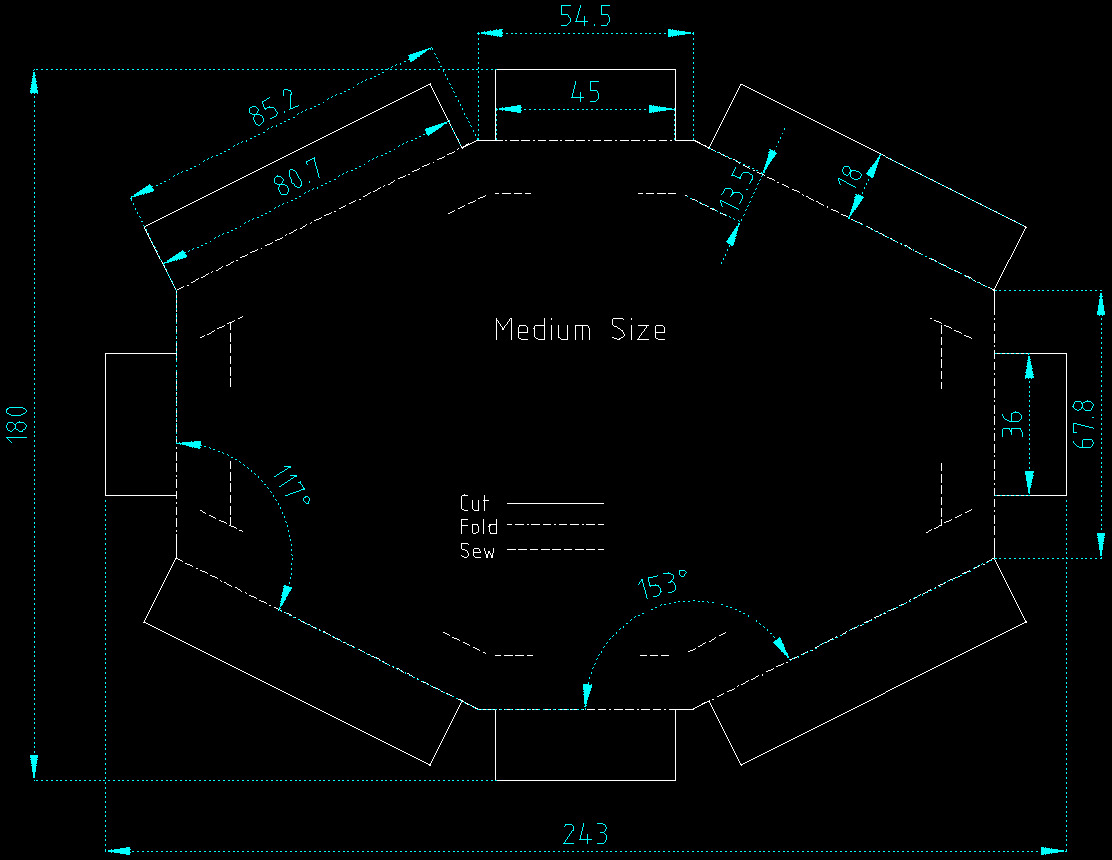
Medium Size - Outer Layer
Large
Inner Layer Dimensions
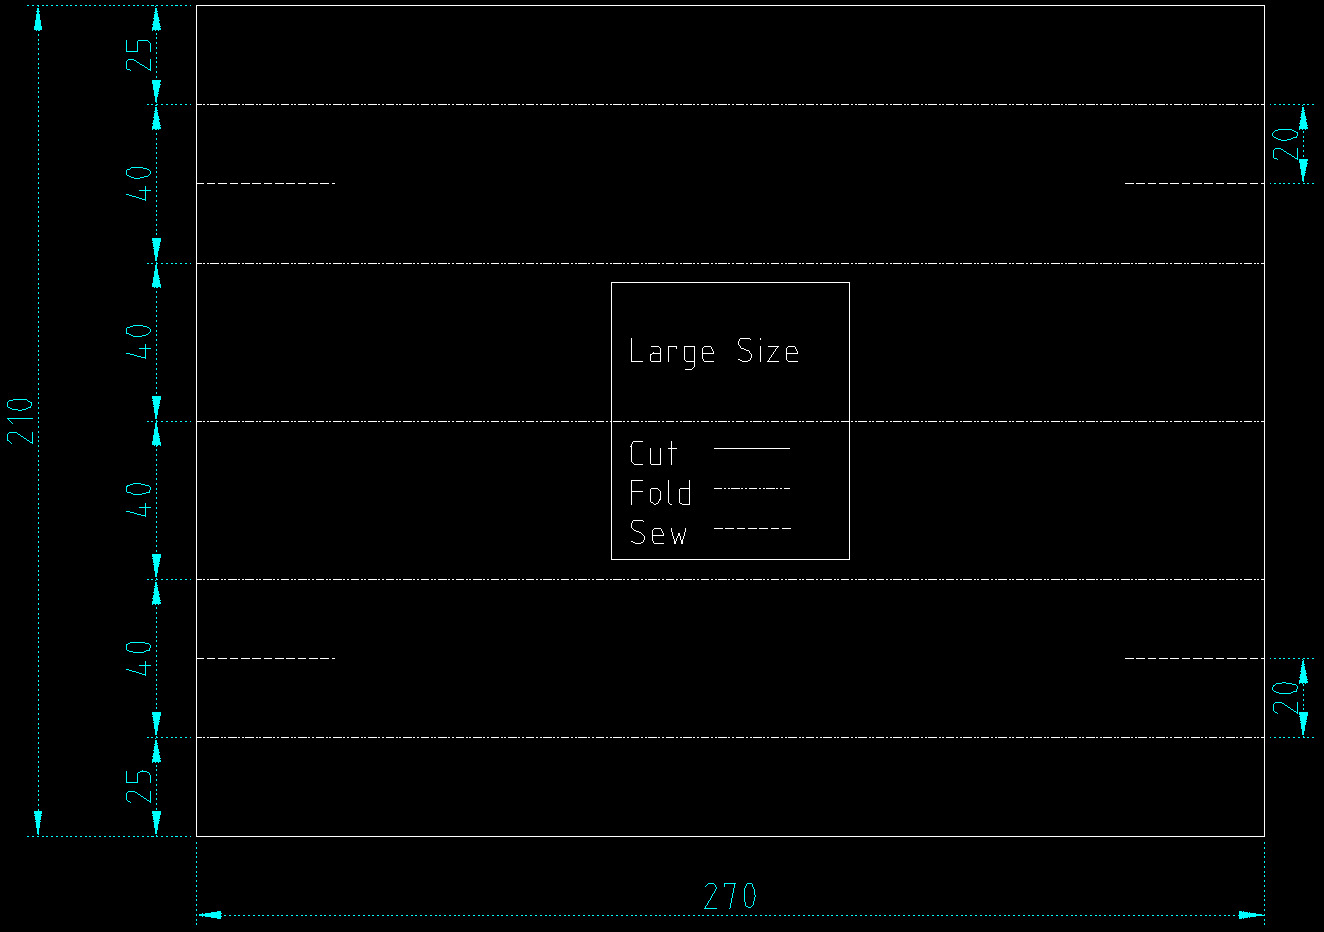
Large Size - Inner Layer
Outer Layer Dimensions
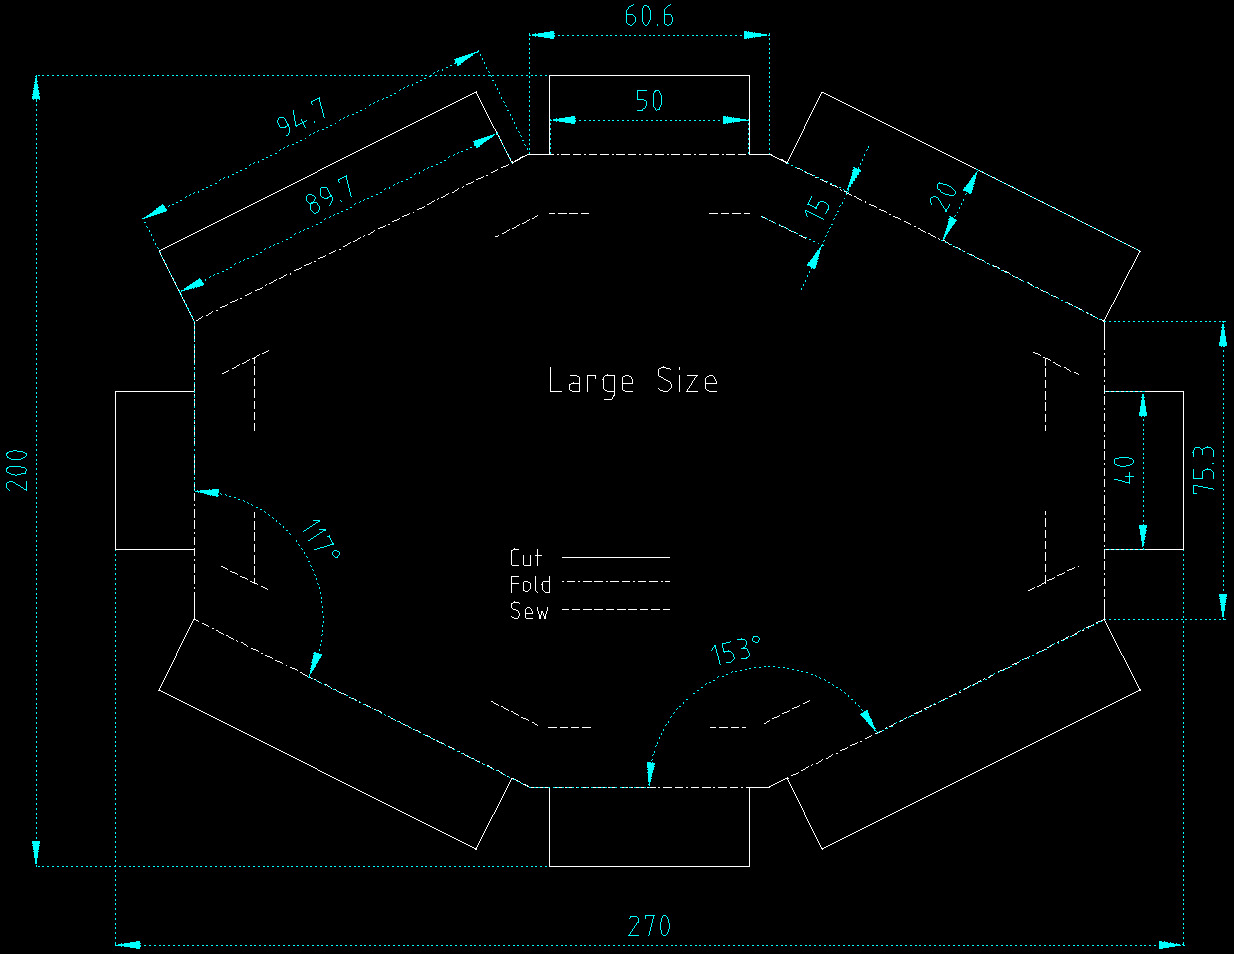
Large Size - Outer Layer